Kenmore Sewing Machine 158: A Comprehensive Guide
Kenmore 158 manuals, including zigzag models (like 158.1941), are available online. Etsy offers vintage manuals and accessories, aiding in operation and repair of these classic machines.
Model Variations and Identification
The Kenmore 158 sewing machine wasn’t a single, monolithic design; rather, it encompassed a range of variations produced over several years. Identifying your specific model is crucial for sourcing the correct parts, manuals, and troubleshooting information. Common model numbers include 158.1941, 15819410, and 158.19410, with slight differences in features and construction.
Early models often feature a more streamlined aesthetic, while later iterations might incorporate minor design updates. The presence of a zigzag function is a key differentiator – models explicitly labeled with “zigzag” capability (as seen in available manuals on platforms like Etsy) offer expanded stitch options. Examining the machine’s serial number, typically located on a metal plate, can help pinpoint its manufacturing date and specific variant.
Furthermore, accessory compatibility can vary between models. Vintage Kenmore 158 machines frequently came with a selection of cams and accessories, as advertised on online marketplaces. Careful observation of these details, combined with reference to available documentation, will enable accurate identification of your Kenmore 158.
Dating Your Kenmore 158
Determining the age of your Kenmore 158 sewing machine can be valuable for understanding its history and sourcing appropriate repair materials. While a precise date requires detailed records, several clues can help narrow down the timeframe. The most reliable method involves locating the serial number, usually found on a metal plate affixed to the machine.
Unfortunately, a publicly accessible Kenmore serial number database is limited. However, the model number itself provides some indication. Variations like 158.1941, 15819410, and 158.19410 suggest production periods within the mid-20th century. Online marketplaces, such as Etsy, often feature listings for these machines, sometimes with seller insights into their acquisition dates.
Examining the machine’s construction and features can also offer clues. Earlier models may exhibit different materials or manufacturing techniques compared to later versions. Comparing your machine to images and descriptions in vintage manuals (available online) can further refine your estimate. Remember that Kenmore retailed machines manufactured by various companies, adding complexity to the dating process.
Key Features of the Kenmore 158
The Kenmore 158 sewing machine, particularly models like the 158.1941, is celebrated for its robust construction and reliable performance. A defining feature is its versatility, capable of handling a wide range of fabrics and sewing tasks. Many models boast a zigzag stitch function, expanding creative possibilities beyond straight stitching.
Accessory compatibility is another key strength. The 158 often accommodates a variety of presser feet, cams, and attachments, enhancing its functionality. These accessories, sometimes found for sale on platforms like Etsy, allow for specialized techniques like buttonholes, darning, and decorative stitching.
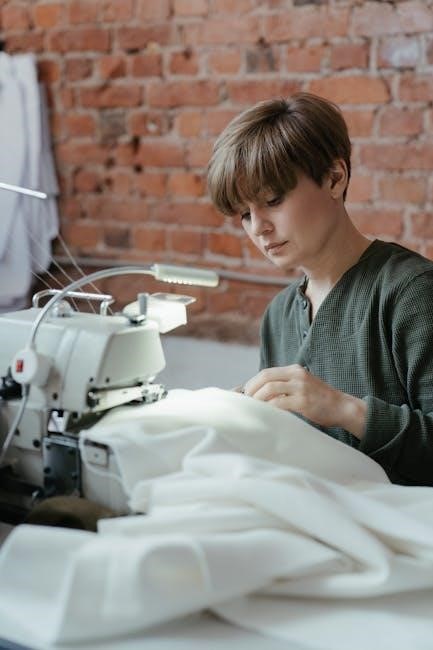
The machine’s mechanical operation provides a tactile sewing experience favored by many enthusiasts. While lacking modern computerized features, the 158’s simplicity contributes to its durability and ease of maintenance. Vintage manuals detail the operation of these features, guiding users through stitch selection, tension adjustment, and other essential settings. The availability of these manuals ensures continued usability for generations.
Setting Up Your Kenmore 158
Proper setup is crucial for optimal performance of your Kenmore 158. Begin by placing the machine on a stable, level surface. Ensure adequate lighting to clearly see the components. Refer to your Kenmore 158 manual for specific instructions, as slight variations exist between models (like the 158.1941).
Next, connect the power cord and verify the voltage matches your household supply. Before threading, inspect the machine for any existing thread or debris. Cleanliness is vital for smooth operation. The manual will illustrate the correct placement of the spool pin and thread guides.
Pay close attention to the bobbin area. Ensure the bobbin case is correctly inserted and the bobbin is wound evenly. A properly wound bobbin is essential for balanced stitch formation. Finally, familiarize yourself with the stitch regulator and tension dials, as these will be adjusted during threading and sewing. A well-prepared machine, guided by the manual, ensures a successful sewing experience.

Threading the Kenmore 158
Threading your Kenmore 158 correctly is paramount for consistent stitch quality. Always consult your machine’s manual – variations exist, particularly with zigzag models like the 158.1941. Begin by raising the presser foot; this opens the tension discs, allowing the thread to seat properly.

Place the spool of thread on the spool pin, securing it with a spool cap. Guide the thread through the first thread guide, then down and around the tension discs. Ensure the thread snaps into the tension discs for proper control. Next, follow the path indicated in the manual, leading the thread through additional guides and the take-up lever.
Finally, thread the needle from front to back. The manual will illustrate the correct needle threading technique. After threading, gently pull the thread to ensure it’s fully seated in the tension discs and take-up lever. A correctly threaded machine, as detailed in the manual, is the foundation for successful sewing.
Bobbin Winding on the Kenmore 158
Proper bobbin winding is crucial for the Kenmore 158’s performance. Refer to your machine’s manual for specific instructions, as slight variations may exist between models (including the 158.1941). Begin by placing the spool of thread on the spool pin, securing it with a cap.
Thread the thread through the designated bobbin winding guides. These guides ensure even distribution of thread onto the bobbin. Next, place the empty bobbin onto the bobbin winder spindle. Engage the bobbin winder by pushing it to the right (or as indicated in your manual).
Hold the thread tail firmly for the first few rotations to prevent slipping. Press the foot pedal gently to start winding. The machine will automatically stop when the bobbin is full. Disengage the bobbin winder and remove the full bobbin. A consistently wound bobbin, guided by the manual, ensures smooth and even stitching.
Basic Stitch Selection and Adjustment
The Kenmore 158 offers a range of stitch options, typically selected via dials or buttons on the machine’s front panel. Consult your specific model’s manual (like those found for the 158.1941) to understand the function of each setting. Common stitches include straight stitch, zigzag, and potentially buttonhole options.
To select a stitch, rotate the stitch selection dial to the desired setting. The manual will illustrate each stitch pattern. Adjusting stitch length and width is usually done with separate dials. Experiment with different settings on scrap fabric to understand their effect.
For straight stitching, a stitch length of 2.5mm is a good starting point. Zigzag stitch width and length depend on the application – wider and longer for stretch fabrics, narrower and shorter for reinforcing seams. Precise adjustments, guided by the manual, are key to achieving professional results. Remember to test before sewing your final project!
Troubleshooting Common Issues
Many issues with the Kenmore 158 can be resolved with basic troubleshooting. If the machine isn’t sewing, ensure it’s properly threaded (refer to your manual) and the bobbin is correctly inserted. A jammed needle is common; carefully remove the fabric and re-thread the needle, using a new needle if bent.
Skipped stitches often indicate a dull or incorrect needle size for the fabric. Consult the manual for recommended needle types. Tension problems can cause looping or puckering. Adjust the tension dials incrementally, testing on scrap fabric after each adjustment.
If the motor runs but the needle doesn’t move, a broken belt or timing issue may be the cause – these require more advanced repair. Online resources and manuals (like those available on Etsy for models like 158.1941) can help diagnose problems, but complex repairs may necessitate a professional technician.
Kenmore 158: Motor and Electrical Components
The Kenmore 158 typically features a robust, yet relatively simple, electric motor. These machines generally operate on standard household current. The motor’s functionality is crucial for consistent sewing performance, and maintaining its condition is key to longevity.
Electrical components include the foot pedal, which controls the motor’s speed, and the wiring connecting the pedal to the motor itself. Inspecting these connections for fraying or damage is a vital maintenance step. The manual, even vintage versions found online (like those for model 158.1941 on Etsy), often includes basic wiring diagrams.
While attempting electrical repairs yourself is possible, it’s strongly advised to disconnect the machine from power and, if unsure, consult a qualified electrician. Replacing a worn foot pedal or addressing minor wiring issues can restore functionality, but major motor repairs are best left to professionals.
Maintenance and Cleaning
Regular maintenance is vital for the longevity of your Kenmore 158. The sewing machine manual, even vintage copies sourced from platforms like Etsy, emphasizes consistent cleaning. Lint buildup is a primary concern, impacting stitch quality and potentially causing mechanical issues.
Use a soft brush to remove lint from the bobbin area, feed dogs, and around the needle plate after each use. Periodically, a small amount of sewing machine oil should be applied to key moving parts – consult the manual for specific lubrication points. Avoid over-oiling, as this can attract more lint.
The exterior can be cleaned with a damp cloth. Avoid harsh chemicals or abrasive cleaners, which could damage the finish. Inspect belts for wear and tear, and replace them as needed. Proper cleaning and lubrication, guided by the Kenmore 158 manual, will ensure smooth and reliable operation for years to come.
Understanding the Stitch Regulator
The stitch regulator on the Kenmore 158 is a crucial component for controlling stitch length. Your machine’s manual will detail how to adjust this regulator, typically using a dial or lever. Understanding its function is key to achieving desired sewing results.
A lower setting produces shorter stitches, ideal for delicate fabrics or reinforcing seams. Higher settings create longer stitches, suitable for basting or heavier materials. Experimentation is encouraged, but always refer to the manual for recommended settings based on fabric type and thread weight.
The stitch regulator interacts with the feed dogs, dictating how much fabric advances with each stitch. Consistent stitch length is vital for professional-looking seams. If stitches appear uneven, check the regulator setting and ensure the machine is properly lubricated, as outlined in the Kenmore 158 manual. Mastering this feature unlocks greater control over your sewing projects.
Accessory Compatibility
The Kenmore 158 sewing machine, despite its age, boasts surprising accessory compatibility. While original Kenmore attachments are highly sought after, many Singer accessories are also functional, due to shared manufacturing origins. This expands your options for specialized tasks.
Common compatible accessories include various presser feet – zigzag, rolled hem, and buttonhole feet – enhancing the machine’s versatility. The availability of these accessories, both original and compatible, is often found through online marketplaces like Etsy. Searching for “Kenmore 158 accessories” or “Singer accessories” yields numerous results.
The manual for your specific Kenmore 158 model will list officially supported attachments. However, don’t hesitate to explore compatible options. Ensure any accessory fits securely and doesn’t impede the machine’s operation. Careful research and a bit of experimentation can significantly broaden the capabilities of your vintage Kenmore.
Zigzag Stitch Functionality
The Kenmore 158, particularly models like the 158.1941, features a robust zigzag stitch capability, significantly expanding its sewing potential beyond straight stitches. This functionality allows for decorative stitching, overcasting raw edges to prevent fraying, and creating buttonholes – essential for garment construction.
The width and length of the zigzag stitch are adjustable, controlled by dials on the machine. Refer to your Kenmore 158 manual for specific settings and recommended adjustments for different fabrics and applications. Mastering these controls unlocks a wide range of creative possibilities.
Finding a manual specifically for your zigzag Kenmore 158 is crucial for understanding its full capabilities. Etsy offers vintage manuals that detail stitch settings and troubleshooting tips. Proper tension adjustment is vital for achieving a balanced and professional-looking zigzag stitch. Experimentation with different settings and fabrics is encouraged to refine your technique.
Kenmore 158: Repair Resources and Parts
Maintaining a vintage Kenmore 158 often requires sourcing replacement parts and accessing repair information. While Kenmore no longer directly supports these older models, a thriving community and online resources exist to assist owners.
Etsy emerges as a valuable platform for locating both original Kenmore 158 parts and reproduction components. Common replacements include bobbins, needles, belts, and even more complex mechanisms. Searching specifically for your model number (e.g., 158.1941) will yield more accurate results.
Vintage sewing machine repair manuals, often available on Etsy, provide detailed diagrams and instructions for disassembly, cleaning, and repair. Online forums and sewing machine enthusiast groups can offer troubleshooting advice and connect you with experienced technicians. Remember to consult a manual before attempting any repairs to avoid damaging your machine. Careful research and patience are key to restoring your Kenmore 158 to optimal working condition.
Finding Manuals and Documentation
Locating original manuals and documentation for the Kenmore 158 sewing machine can significantly aid in its operation, maintenance, and repair. Given the age of these machines, finding official Kenmore-issued materials can be challenging, but several avenues exist.
Etsy is a primary resource, frequently hosting scanned copies of original Kenmore 158 manuals, including those for zigzag models like the 158.1941. These listings often offer downloadable PDFs or physical copies of the manuals. Searching with your specific model number is crucial for accuracy.
Online sewing machine forums and enthusiast communities often share digitized manuals and documentation. These platforms can be invaluable for accessing information not readily available elsewhere. Additionally, exploring vintage sewing machine websites and archives may uncover relevant resources. Remember to verify the manual’s compatibility with your specific Kenmore 158 variant before relying on its instructions. A well-preserved manual is a key asset for any Kenmore 158 owner.