Converting a 1UZ-FE automatic to a manual transmission, especially for 4×4 applications like the Toyota Surf, is gaining traction amongst enthusiasts.
Numerous online resources, including YouTube videos, demonstrate successful swaps and highlight the benefits of enhanced control and driving experience.
Overview of the 1UZ-FE Engine
The 1UZ-FE is a renowned 4.0-liter V8 engine, celebrated for its smoothness, reliability, and potential for high performance. Originally equipped in Lexus LS400 and Toyota Celsior models, it’s become a popular choice for engine swaps due to its robust construction and readily available parts.
Its inherent balance and relatively compact size make it surprisingly adaptable to various chassis. The engine’s popularity is evident in the growing number of conversions, including those paired with manual transmissions, as showcased in online communities and videos detailing Toyota Surf modifications. The 1UZ-FE’s inherent strength allows it to handle the increased power demands often associated with manual transmission setups.
Why Choose a Manual Transmission for the 1UZ-FE?
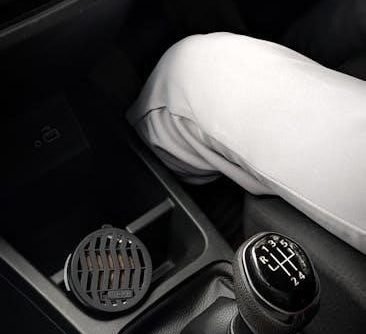
Swapping to a manual transmission unlocks a more engaging driving experience with the 1UZ-FE. Enthusiasts often seek greater control over gear selection, particularly in 4×4 applications like the Toyota Surf, as demonstrated in conversion videos. A manual setup eliminates torque converter losses, potentially improving efficiency and responsiveness.
Furthermore, it allows for more precise engine braking and a direct connection to the drivetrain. The ability to choose gears manually is highly valued by those prioritizing driving feel and performance over the convenience of an automatic.
Planning Your 1UZ-FE Manual Swap
Successful 1UZ-FE manual swaps require careful planning, including identifying compatible transmissions, sourcing components, and addressing potential challenges, especially in 4×4 conversions.
Identifying Compatible Manual Transmissions
Choosing the right manual transmission for your 1UZ-FE swap is crucial. Several options exist, each with its own advantages and disadvantages. Popular choices include transmissions from the Toyota Supra (JZA80), Toyota Aristo (JZS161), and even some versions found in the Lexus GS300.
Compatibility hinges on bellhousing patterns and input shaft splines. The Supra transmission is often favored for its robust build and readily available aftermarket support. However, Aristo transmissions can offer a more cost-effective solution. Thorough research is vital to ensure proper fitment and functionality with the 1UZ-FE engine.
Sourcing a Suitable Transmission
Locating a compatible manual transmission requires diligent searching. Japanese import specialists are excellent sources, often offering a wide selection of JZA80 Supra or JZS161 Aristo transmissions. Online marketplaces, such as eBay, can also yield results, but careful inspection of the seller’s reputation is essential.
Local salvage yards might occasionally have suitable options, though condition can vary significantly. Expect to pay between $800 and $2500, depending on the model, condition, and included components. Prioritize transmissions with documented history and minimal wear for a smoother swap process.
Gathering Necessary Components
Beyond the transmission itself, a comprehensive parts list is crucial. This includes a flywheel specifically designed for the 1UZ-FE engine paired with the chosen transmission. A performance clutch kit, encompassing the disc, pressure plate, and throw-out bearing, is also vital. Don’t forget the pedal assembly, master and slave cylinders, and potentially a new driveshaft.
You’ll also need transmission mounts, potentially requiring fabrication or adaptation. Wiring harnesses and an ECU capable of supporting a manual transmission are essential. Finally, gather fluids, hardware, and any necessary adapters for a seamless installation.

Technical Aspects of the Swap
Successfully integrating a manual transmission requires careful attention to detail, including proper flywheel and clutch selection, pedal box installation, and driveshaft modifications for optimal fitment.
Flywheel and Clutch Selection
Choosing the correct flywheel and clutch setup is paramount for a reliable 1UZ-FE manual swap. The flywheel’s weight influences engine responsiveness; lighter options offer quicker revs, while heavier ones provide smoother launches. Clutch selection depends heavily on intended use – a strengthened clutch is vital for high-horsepower builds.
Compatibility is key; ensure the flywheel matches the chosen transmission and the clutch disc’s spline count aligns with the crankshaft. Consider pressure plate clamping force for optimal engagement and preventing slippage. Researching forums and builds utilizing similar setups will provide valuable insights into proven combinations.
Pedal Box and Master Cylinder Installation
Installing a manual pedal box is crucial, as the automatic’s setup is incompatible. Sourcing a complete pedal assembly from a compatible Toyota model – often a Supra or Aristo – simplifies the process. Proper mounting is essential for safety and functionality; fabrication may be required for a secure fit.
The master cylinder connects to the pedal box and hydraulic clutch. Selecting a master cylinder with the correct bore size ensures optimal pedal feel and clutch engagement. Careful bleeding of the hydraulic line is vital to eliminate air and achieve smooth clutch operation.
Transmission Mount Fabrication or Adaptation
The 1UZ-FE manual swap often necessitates custom transmission mount solutions. The original automatic transmission mount won’t align with the manual gearbox. Adapting an existing mount is possible, but frequently requires reinforcement and welding. Fabricating a new mount from scratch offers precise positioning and robust support.
Precise alignment is paramount to prevent vibrations and stress on the drivetrain. Using high-quality materials and ensuring proper welding techniques are critical for durability. Thorough testing after installation confirms the mount’s integrity and stability during operation.
Driveshaft Modification or Replacement
Following a 1UZ-FE manual transmission swap, the driveshaft often requires attention. The length difference between the automatic and manual transmissions frequently necessitates modification or complete replacement. Simply shortening the existing driveshaft might suffice, but balancing is crucial to avoid vibrations.
For significant length changes, a custom driveshaft is recommended, ensuring correct slip yoke engagement and U-joint angles. Incorrect angles can lead to premature wear and drivetrain failure. Professional driveshaft services guarantee proper fitment and balance, maximizing longevity and performance.
Wiring and ECU Considerations
The 1UZ-FE manual swap demands careful wiring adjustments. The automatic transmission wiring needs to be removed, and provisions made for the manual transmission’s sensors and solenoids. The ECU may require reprogramming or a standalone unit to function correctly with the manual transmission.
Disabling automatic transmission-related fault codes is essential; Some swaps utilize aftermarket ECUs for full control and tuning capabilities. Proper wiring and ECU calibration are vital for smooth operation, preventing error messages, and optimizing engine performance with the new drivetrain.
Addressing 4WD Specific Challenges
Successful 1UZ-FE swaps into 4WD vehicles, like the Toyota Surf, require addressing transfer case compatibility, front/rear differential considerations, and prop shaft adjustments for proper angles.
Transfer Case Compatibility
When undertaking a 1UZ-FE manual swap into a 4WD vehicle, ensuring transfer case compatibility is paramount. The original automatic transmission’s transfer case connection may not directly align with the manual transmission’s output shaft. Researching and potentially adapting a compatible transfer case, or utilizing an adapter plate, becomes necessary.
Online resources demonstrate that some swaps involve retaining the factory transfer case with modifications, while others necessitate sourcing a transfer case specifically designed to work with the chosen manual transmission. Careful consideration of gear ratios and overall drivetrain functionality is crucial for optimal performance and reliability in a 4WD application.
Front Differential Considerations
Following a 1UZ-FE manual swap in a 4WD vehicle, the front differential requires careful evaluation. While the differential itself may not necessitate immediate changes, verifying its compatibility with the revised drivetrain is vital. Alterations to the engine and transmission can impact driveline angles and potentially introduce stress on the front differential components.
Inspect the front differential for any signs of wear or damage, and consider upgrading to a stronger unit if the vehicle is intended for demanding off-road use. Maintaining proper lubrication and ensuring correct gear mesh are essential for long-term reliability.
Rear Differential Considerations
Similar to the front differential, the rear unit needs assessment post-1UZ-FE manual swap, particularly in 4WD conversions. Changes in engine torque characteristics and the removal of the torque converter’s multiplication effect can influence the rear differential’s workload. Confirming the differential’s ability to handle the increased power is crucial for preventing premature failure.
Evaluate the rear differential’s gear ratio in relation to the new transmission and intended vehicle use. Consider upgrading to a limited-slip differential (LSD) for improved traction, especially if off-roading is a priority. Regular fluid changes are paramount for longevity.
Prop Shaft Length and Angles
A critical aspect of a successful 1UZ-FE manual swap, especially in 4WD vehicles, involves meticulous attention to prop shaft length and operating angles. The manual transmission’s different physical dimensions compared to the automatic necessitate adjustments to ensure proper driveline geometry.
Incorrect angles can induce vibrations and premature wear on universal joints and the differential. Measuring and potentially modifying or replacing the prop shaft is often required. Maintaining optimal slip yoke travel is also vital to accommodate suspension movement and prevent binding.
Installation Process
The core of the swap involves removing the automatic transmission and installing the manual unit, followed by connecting the clutch system and integrating the wiring harness.
Removing the Automatic Transmission
Begin by disconnecting the driveshaft, shift linkage, and all electrical connectors attached to the automatic transmission. Support the engine from above to prevent it from tilting when the transmission is removed. Carefully drain the transmission fluid before unbolting the transmission from the engine.
Lower the transmission slowly, ensuring no wires or hoses remain connected. This process requires patience and attention to detail to avoid damaging any components. Once clear, prepare the bellhousing area for the manual transmission installation, cleaning and inspecting for any damage.
Installing the Manual Transmission
Carefully align the manual transmission with the engine, ensuring the pilot shaft engages smoothly into the crankshaft. Gently push the transmission into position, taking care not to damage the clutch disc. Secure the transmission to the engine using the appropriate bolts, tightening them to the manufacturer’s specified torque.
Double-check all connections and mounting points before proceeding. This step is crucial for proper alignment and preventing vibrations. Ensure the transmission mount is securely fastened to the chassis, providing stable support.
Connecting the Clutch System
Precisely align the clutch disc with the pilot bearing and flywheel, utilizing a clutch alignment tool to ensure proper centering. Carefully install the pressure plate, securing it with the appropriate bolts and tightening them in a star pattern to evenly distribute pressure.
Next, connect the clutch fork to the release bearing, verifying smooth and unrestricted movement. Properly route the clutch hydraulic line, bleeding the system thoroughly to eliminate air bubbles and ensure optimal clutch engagement. Confirm full travel and proper function.
Wiring Harness Integration
Carefully integrate the manual transmission’s wiring with the 1UZ-FE’s existing harness, focusing on the reverse light switch and any transmission-related sensors. Disable or remove the automatic transmission control signals to prevent conflicting error codes.
ECU adjustments are often necessary to accommodate the manual transmission, potentially requiring a standalone ECU or a custom tune. Ensure all connections are secure and properly insulated, verifying functionality with a scan tool post-installation. Thorough testing is crucial for reliable operation.

Post-Installation Adjustments and Troubleshooting
Following the swap, meticulous clutch adjustment and ECU tuning are vital. Address potential issues like gear selection or slippage for optimal performance and reliability.
Clutch Adjustment
Proper clutch adjustment is paramount after a 1UZ-FE manual swap, ensuring smooth engagement and preventing premature wear. Begin by verifying the clutch fork is correctly positioned and moves freely. Adjust the clutch cable, if applicable, to achieve the correct pedal free play – typically around 10-15mm.
Insufficient free play can cause constant clutch slippage, while excessive play hinders full disengagement. Carefully monitor for signs of slippage during test drives, particularly under load; Fine-tune the adjustment until smooth, consistent engagement is achieved across all gears. Incorrect adjustment can lead to transmission damage.
ECU Tuning and Calibration
Following a 1UZ-FE manual transmission swap, ECU tuning is crucial for optimal performance and reliability. The original automatic transmission programming will be incompatible with the manual setup, potentially causing issues like incorrect speed sensor readings or suboptimal fuel delivery.
A standalone ECU or a re-flash of the factory ECU is recommended. Tuning should address the removal of automatic transmission control parameters and incorporate settings tailored for the manual gearbox. This ensures accurate engine operation, maximizes power output, and prevents potential drivetrain damage. Proper calibration is essential.
Addressing Potential Issues
Post-installation, several issues may arise during a 1UZ-FE manual swap; Gear selection problems, potentially stemming from improper clutch adjustment or linkage setup, require careful diagnosis. Clutch slippage indicates insufficient clamping force, necessitating a clutch upgrade or adjustment.
Vibration and noise often point to driveshaft imbalances or incorrect angles, demanding modification or replacement. Thoroughly inspect all connections and mounts. Addressing these concerns promptly ensures a smooth, reliable, and enjoyable driving experience after the conversion is complete.
Common Problems and Solutions
Frequently encountered issues include gear selection difficulties, clutch slippage, and unwanted vibrations or noises post-swap. Careful adjustments and component upgrades typically resolve these challenges.
Gear Selection Issues
Difficulty engaging specific gears, or experiencing imprecise shifting, can arise after a 1UZ-FE manual swap. This often stems from improper clutch cable adjustment, leading to incomplete disengagement. Thoroughly check and adjust the cable tension, ensuring smooth pedal travel.
Internal transmission issues, though less common, should also be considered. Inspect the shift linkage for binding or wear, and verify the correct operation of the shift forks within the transmission itself. A properly bled hydraulic clutch system (if applicable) is also crucial for optimal gear changes.
Clutch Slippage
Clutch slippage, indicated by high engine RPMs without corresponding vehicle acceleration, is a frequent concern post-swap. This usually points to a worn or improperly installed clutch disc. Ensure the clutch disc is rated for the 1UZ-FE’s torque output and that the pressure plate is functioning correctly.
Contamination from oil or grease during installation can also cause slippage. Thoroughly clean all clutch components before assembly. Verify proper flywheel surface preparation and adequate clamping force from the pressure plate for reliable engagement.
Vibration and Noise
Post-swap, unusual vibrations or noises often arise, demanding careful investigation. Driveshaft imbalances, incorrect U-joint angles, or transmission mount issues are common culprits. Inspect the driveshaft for damage and ensure it’s properly balanced. Verify the transmission mount is securely fastened and adequately supports the transmission’s weight.
Internal transmission noise could indicate worn gears or bearings, requiring professional diagnosis. Check for loose components and ensure proper alignment throughout the drivetrain to minimize vibrations and unwanted sounds.
Resources and Support
Online forums and communities dedicated to Toyota swaps, alongside professional installation services, provide invaluable assistance for your 1UZ-FE manual conversion journey.
Online Forums and Communities
Dedicated online platforms are crucial for 1UZ-FE manual swap enthusiasts. These forums serve as central hubs for sharing knowledge, troubleshooting issues, and connecting with individuals who have completed similar projects. Expect to find detailed build threads, parts sourcing advice, and solutions to common problems encountered during the conversion process.
Active communities offer a collaborative environment where you can ask questions, receive guidance from experienced swappers, and benefit from collective wisdom. Searching these forums can often reveal solutions to challenges specific to the 1UZ-FE, saving you time and frustration. Remember to utilize the search function before posting!
Professional Installation Services
For those lacking the necessary skills or time, professional installation services offer a viable alternative to a DIY 1UZ-FE manual swap. Experienced mechanics specializing in engine swaps can ensure a precise and reliable conversion, minimizing the risk of errors and potential long-term issues.
These services typically handle all aspects of the swap, from parts sourcing and fabrication to wiring and ECU tuning. While more expensive than a self-install, professional installation provides peace of mind and a warranty on the workmanship, potentially saving money on future repairs.

Cost Estimation for the Swap
Estimating costs for a 1UZ-FE manual swap varies greatly, encompassing parts like the transmission itself, clutch kits, and potential fabrication expenses for a proper fit.
Parts Costs
The financial outlay for components in a 1UZ-FE manual transmission swap can fluctuate significantly. A suitable manual transmission itself can range from $800 to $2500, depending on its condition and origin. Clutch kits, including the disc, pressure plate, and throw-out bearing, typically cost between $300 and $600.
Additional expenses include a flywheel, potentially needing modification or replacement ($200-$500), and the pedal assembly ($150-$400). Don’t forget the master and slave cylinders for the clutch system ($100-$300). Expect to spend money on driveshaft modifications or a replacement ($300-$800), and potentially a new transmission mount ($50-$200).
Labor Costs (if applicable)
Professional installation of a 1UZ-FE manual transmission swap can significantly increase the overall cost. Labor rates vary widely based on location and shop expertise, generally ranging from $80 to $150 per hour. A complete swap, including removal of the automatic, installation of the manual, and associated modifications, could require 40 to 80 hours of labor.
This translates to a labor cost between $3,200 and $12,000. Fabrication of custom parts, like transmission mounts or driveshaft modifications, will add to these expenses. Consider the cost of ECU tuning, which can range from $300 to $800, if performed by a professional tuner.
Legal Considerations
Ensure your 1UZ-FE manual swap complies with local emissions regulations and vehicle registration requirements. Modifications may necessitate inspection and approval to remain road legal.
Emissions Regulations
Navigating emissions regulations is crucial during a 1UZ-FE manual transmission swap. Modifications impacting the engine’s control systems, even a transmission change, can affect compliance. Verify local laws regarding aftermarket ECU tuning and ensure any adjustments maintain emissions standards.
Some regions require re-certification after significant alterations. Utilizing original equipment manufacturer (OEM) components where possible can simplify the process. Thorough documentation of all changes is essential for inspection. Failure to comply can result in fines or the inability to legally operate the vehicle on public roads.
Vehicle Registration
Post-swap, updating your vehicle registration is paramount. Many jurisdictions require notification of significant modifications like a manual transmission conversion. Be prepared to present documentation proving the swap was performed correctly and meets safety standards.
This may involve an inspection to verify the installation of components like the clutch system and wiring. Ensure your vehicle identification number (VIN) is accurately recorded with the changes. Failure to update registration can lead to legal issues and insurance complications, potentially voiding coverage.