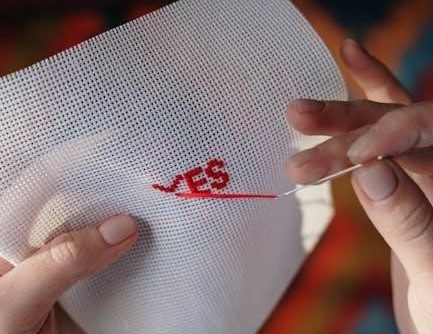
Needlepoint stitch guides are essential resources‚ offering detailed stitch selections and placement advice for diverse projects․ They bridge the gap between canvas and finished art!
What is a Needlepoint Stitch Guide?
A needlepoint stitch guide is a meticulously planned document created to accompany a specific needlepoint canvas․ It’s far more than just a list of stitches; it’s a comprehensive roadmap for bringing a design to life․ These guides detail which stitches to use in which areas of the canvas‚ often including specific thread colors and quantities․
Experienced stitchers‚ and even designers‚ create these guides‚ considering texture‚ detail‚ and the overall aesthetic goal․ They often incorporate a variety of stitches – from basic Tent Stitch to more complex decorative techniques – to achieve depth and visual interest․ A good stitch guide will also include a key‚ decoding symbols used on the canvas and within the guide itself‚ ensuring clarity throughout the stitching process․
Why Use a Stitch Guide?
Utilizing a needlepoint stitch guide offers numerous benefits‚ especially for complex designs․ It eliminates guesswork‚ ensuring a cohesive and professional finish․ Guides provide structure‚ preventing overwhelming choices and promoting efficient stitching․ They’re invaluable for stitchers of all levels‚ from beginners seeking direction to experienced crafters wanting fresh inspiration․
Furthermore‚ stitch guides often suggest optimal thread choices‚ saving time and money by minimizing wasted materials․ They can elevate a simple canvas into a stunning piece of art‚ showcasing texture and detail․ Ultimately‚ a well-crafted guide streamlines the process‚ fostering enjoyment and a beautiful‚ completed needlepoint project․
Understanding Basic Needlepoint Stitches
Basic needlepoint stitches form the foundation of any project‚ offering versatility and texture․ Mastering these techniques unlocks creative possibilities for stunning designs!
Tent Stitch: The Foundation
Tent stitch is universally recognized as the bedrock of needlepoint‚ a simple yet incredibly versatile technique․ It involves diagonal stitches worked over the canvas intersections‚ creating a durable and even surface․ This stitch forms the basis for countless designs‚ offering a solid foundation upon which more elaborate stitches can be built․
There are variations like the simple tent‚ where all stitches slant in the same direction‚ and the Mediterranean stitch‚ alternating slant for visual texture․ Mastering tent stitch is crucial‚ as it provides excellent coverage and a clean finish․ It’s often the first stitch beginners learn‚ and experienced stitchers frequently return to it for its reliability and classic appeal․ Understanding tent stitch unlocks a world of needlepoint possibilities!
Continental Stitch: A Common Variation
Continental stitch is a popular variation of tent stitch‚ distinguished by its horizontal progression across the canvas․ Unlike tent stitch’s diagonal approach‚ continental stitch creates rows of angled stitches‚ offering a slightly different texture and visual effect․ It’s known for its speed and efficiency‚ making it ideal for covering large areas of canvas quickly․
The stitch is worked from left to right‚ bringing the needle up on one intersection and down on the adjacent one‚ creating a slanted line․ Many find it more comfortable than tent stitch for extended periods․ It’s frequently used for backgrounds or areas where a subtle texture is desired‚ providing a beautiful alternative to the classic tent stitch․
Basketweave Stitch: Adding Texture
Basketweave stitch‚ as the name suggests‚ mimics the woven appearance of a basket‚ adding delightful texture to your needlepoint projects․ This stitch is created by working two rows of tent stitch – one row going up and the other going down – alternating directions with each row․ This creates a visually interesting pattern resembling an interwoven fabric․
It’s a fantastic choice for backgrounds‚ clothing‚ or any area where you want to introduce subtle dimension․ The alternating diagonal stitches provide a lovely tactile quality and a more complex look than simple tent stitch․ Mastering basketweave opens up creative possibilities for enhancing your needlepoint designs․
Advanced Needlepoint Stitch Techniques
Elevate your needlepoint with techniques like half cross stitch‚ decorative stitches‚ and French knots‚ adding intricate details and dimensional artistry to your work․
Half Cross Stitch: For Detailed Work
Half cross stitch is a versatile technique ideal for rendering fine details within your needlepoint designs․ Unlike a full cross stitch‚ it completes only one half of the ‘X’ shape‚ creating a textured‚ almost shaded effect․ This stitch excels at defining facial features‚ delicate floral elements‚ or intricate patterns where precision is key․
When employing half cross stitch‚ consistently work the same direction across a row to maintain a uniform appearance․ It’s often used in conjunction with other stitches‚ providing subtle contrast and depth․ Mastering this technique allows for nuanced shading and a more realistic portrayal of your chosen design‚ enhancing the overall visual impact of your needlepoint project․ It’s a cornerstone for achieving sophisticated results․
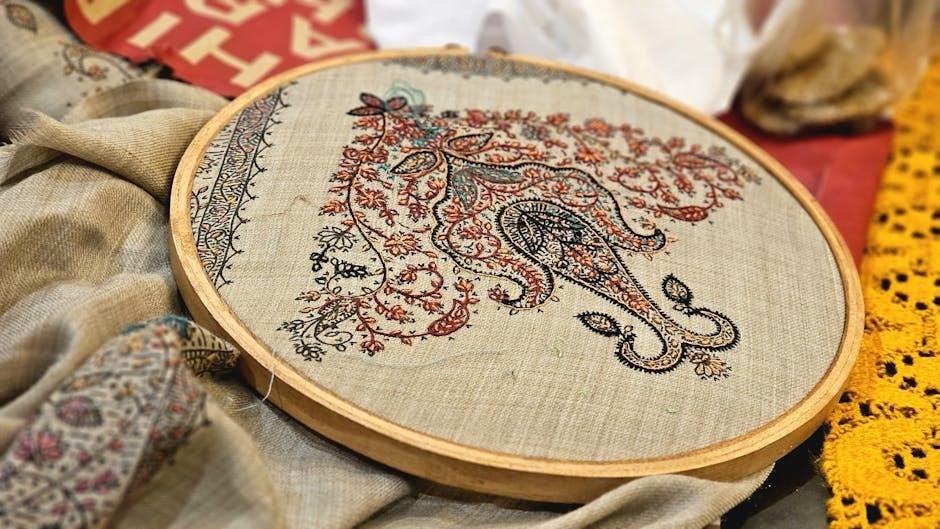
Decorative Stitches: Enriching Your Design
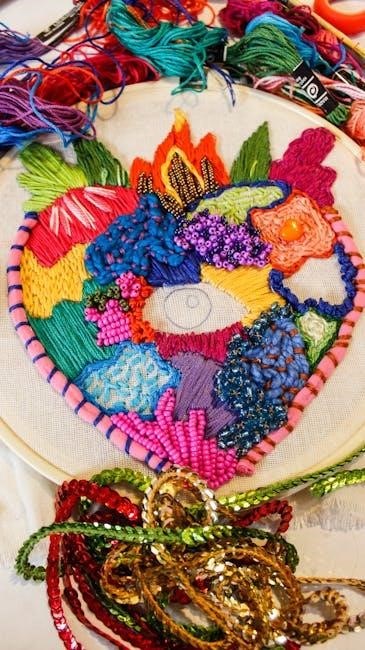
Decorative stitches elevate needlepoint beyond basic coverage‚ introducing texture‚ dimension‚ and visual interest․ These stitches‚ like Algerian Eye‚ Florentine‚ or Smyrna cross‚ aren’t merely functional; they are the design element․ They transform a simple canvas into a stunning work of art‚ adding personality and flair․
Selecting appropriate decorative stitches depends on the design’s style and the desired effect․ Consider the weight and scale of the stitch relative to the canvas․ Experimenting with stitch combinations creates unique textures and highlights specific areas․ Don’t be afraid to explore stitch libraries and sample different options before committing to a final choice – the possibilities are truly endless!
French Knots: Creating Dimensional Elements
French knots are a cornerstone of textural needlepoint‚ offering a delightful three-dimensional effect․ Though seemingly simple‚ mastering the French knot requires practice to achieve consistent size and secure placement․ They’re ideal for flower centers‚ berries‚ animal eyes‚ or scattered accents to add depth․
Varying knot sizes and colors enhances visual interest․ Use multiple strands of floss for larger‚ bolder knots‚ or a single strand for delicate details․ Careful placement is crucial; avoid overcrowding‚ allowing each knot to stand out․ French knots beautifully mimic natural textures‚ bringing a lifelike quality to your needlepoint designs‚ truly enriching the overall aesthetic․
Interpreting Needlepoint Charts & Symbols
Decoding charts is vital! Symbols represent stitches and colors‚ while canvas markings guide placement․ Understanding these elements unlocks your needlepoint design’s potential․
Decoding Stitch Symbols
Stitch symbols are the language of needlepoint charts‚ translating a design into a tangible creation․ These symbols‚ often small icons or abbreviations‚ represent specific stitches – from the foundational Tent Stitch to more elaborate decorative techniques like French Knots․ A comprehensive stitch guide meticulously defines each symbol‚ ensuring clarity and preventing errors․
Charts frequently employ a legend correlating each symbol to its corresponding stitch and color․ Pay close attention to variations within symbols; a slightly altered shape might indicate a different stitch variation or direction․ Recognizing these nuances is crucial for accurately interpreting the designer’s intent and achieving the desired texture and visual effect․ Mastering symbol recognition unlocks the full potential of any needlepoint project‚ transforming a complex chart into an enjoyable and rewarding experience․
Understanding Color Codes
Color codes in needlepoint stitch guides are vital for replicating a design’s intended palette․ These codes‚ often alphanumeric (like DMC 310)‚ pinpoint specific thread shades from a manufacturer’s range․ Guides typically list each symbol alongside its corresponding color code‚ ensuring accurate thread selection․
However‚ dye lots can vary‚ meaning a thread purchased later might slightly differ from an earlier batch․ It’s wise to purchase all necessary threads simultaneously to maintain consistency․ Some guides offer alternative color suggestions if a specific shade is unavailable․ Understanding the coding system and potential variations guarantees a harmonious and visually appealing finished piece‚ faithfully reflecting the original design’s aesthetic․
Reading Canvas Markings
Canvas markings are crucial for interpreting a needlepoint design․ These markings‚ often in the form of symbols or lines‚ indicate stitch placement and color areas․ Understanding these markings is fundamental to accurate stitching․ Some canvases feature pre-printed designs‚ while others require transferring a pattern․
Pay close attention to any key or legend accompanying the canvas‚ as it decodes the symbols․ Lines might denote stitch direction or boundaries․ Occasionally‚ faint markings indicate areas for specific techniques․ Careful observation and referencing the guide ensure correct stitch execution‚ preventing errors and achieving the intended design․ Ignoring these markings can lead to a distorted or inaccurate final product․

Creating Your Own Stitch Guides
Personalized stitch guides empower creativity! Analyze designs‚ select fitting stitches‚ and test combinations to craft unique textures and visual effects for stunning needlepoint results․
Analyzing the Needlepoint Design
Before selecting stitches‚ a thorough design analysis is crucial․ Begin by identifying the key elements – large blocks of color‚ intricate details‚ or flowing lines․ Consider the overall aesthetic; is it modern‚ traditional‚ or whimsical? Note the canvas texture and any pre-printed patterns․
Evaluate the design’s complexity․ Simpler designs may benefit from uniform stitches‚ while intricate patterns demand varied techniques for depth and definition․ Pay attention to negative space; strategic stitch choices can enhance its impact․ Think about the finished piece’s purpose – a pillow‚ ornament‚ or wall hanging – as this influences stitch durability and texture․ Finally‚ envision the color palette and how different stitches will interact with it‚ creating shadows and highlights․
Choosing Appropriate Stitches
Selecting the right stitches hinges on the design analysis․ For large areas‚ consider tent stitch variations – simple‚ continental‚ or basketweave – prioritizing speed and coverage․ Detailed sections demand half cross stitch or decorative stitches like Algerian eye or Rhodes stitch for intricate patterns․
Dimensional elements thrive with French knots or Smyrna cross stitch‚ adding texture and visual interest․ Evaluate yarn weight; finer yarns suit delicate stitches‚ while thicker yarns work well with bolder techniques․ Don’t be afraid to experiment! Test stitch combinations on scrap canvas to assess their appearance and suitability․ Remember‚ stitch choice impacts the final texture and overall aesthetic․
Testing Stitch Combinations
Before committing to a full project‚ rigorously test stitch combinations on scrap canvas mirroring your design’s color palette and yarn weights․ This crucial step reveals how stitches interact‚ influencing texture and visual impact․ Photograph your samples under different lighting conditions to accurately assess the results․
Consider how stitch direction affects the design’s flow and shading․ Experiment with varying stitch lengths and tensions to achieve desired effects․ Don’t limit yourself – unexpected pairings can yield stunning results! Document your tests‚ noting yarn types‚ needle sizes‚ and observations․ This creates a personalized stitch library for future projects‚ ensuring informed decisions․

Resources for Needlepoint Stitch Guides
Numerous online libraries‚ books‚ and needlepoint guilds provide extensive stitch guides and workshops․ These resources offer inspiration and expert guidance for all skill levels․
Online Stitch Libraries
The digital age has revolutionized access to needlepoint stitch guides․ Several websites curate extensive libraries of stitches‚ often accompanied by detailed photographs and video tutorials․ These platforms allow stitchers to explore a vast array of techniques‚ from basic tent stitch variations to complex decorative stitches and textured fills․ Many offer searchable databases‚ enabling users to find stitches based on desired effect‚ stitch count‚ or yarn weight․
Furthermore‚ some online resources feature stitch guides created by experienced needlepoint designers‚ providing curated palettes for specific canvases․ Social media platforms like Pinterest and Instagram also serve as valuable sources of inspiration‚ showcasing stitch combinations and project ideas․ Utilizing these online libraries empowers stitchers to expand their skillset and personalize their needlepoint projects with unique and creative stitch choices․
Books and Publications
Traditional needlepoint stitch guides often find their home within dedicated books and publications․ These resources offer a comprehensive and curated collection of stitches‚ frequently presented with clear diagrams and step-by-step instructions․ Many publications delve into the history and origins of various stitches‚ providing context alongside technique․ Books often categorize stitches by texture‚ complexity‚ or suitability for specific design elements․
Moreover‚ specialized magazines and journals regularly feature stitch guides and project ideas‚ keeping stitchers abreast of current trends and innovative techniques․ These printed materials provide a tactile learning experience‚ allowing for focused study and reference without the distractions of a digital screen․ They remain a valuable asset for both beginner and experienced needlepointers seeking inspiration and guidance․
Needlepoint Guilds and Workshops
Needlepoint guilds represent vibrant communities offering invaluable access to stitch guide expertise․ Members frequently share personalized stitch guides tailored to specific projects‚ fostering collaborative learning and problem-solving․ Guilds often host workshops led by experienced needlepointers‚ providing hands-on instruction in advanced techniques and stitch selection․
Workshops‚ whether organized by guilds or independent instructors‚ offer focused learning environments․ These sessions allow stitchers to experiment with new stitches under expert guidance‚ receiving immediate feedback and refining their skills․ They’re excellent for interpreting complex charts and understanding how to adapt stitch guides to individual design preferences‚ building confidence and expanding creative horizons․
Troubleshooting Common Stitching Problems
Addressing issues like uneven tension or canvas distortion is crucial․ Stitch guides can help identify and correct these problems‚ ensuring a polished‚ professional finish!
Dealing with Uneven Tension
Maintaining consistent tension is paramount in needlepoint․ Uneven tension leads to puckering‚ distortion‚ and an overall unprofessional appearance․ A stitch guide often provides guidance on achieving the correct tension for each stitch‚ recommending needle size and yarn weight combinations․
If you notice loops forming or stitches appearing too loose‚ gently tug on the yarn after each stitch‚ but avoid over-tightening; Conversely‚ if stitches are overly tight and the canvas is buckling‚ loosen your grip slightly․ Regularly checking the reverse side of your work can reveal tension inconsistencies before they become major problems․
Practice makes perfect! Experiment with different techniques and yarn types to find what works best for you․ Utilizing a good frame or keeping the canvas taut during stitching also significantly aids in maintaining even tension throughout your project․
Fixing Mistakes
Even experienced stitchers make errors! A good stitch guide acknowledges this and often includes advice on correcting them․ The best approach depends on the mistake’s severity and the stitch used․ For simple errors‚ carefully remove the offending stitches with a seam ripper or small‚ sharp scissors‚ being cautious not to damage surrounding stitches or the canvas․
When removing multiple stitches‚ work slowly and methodically․ Re-stitch the area using the correct yarn and technique‚ referencing your stitch guide for clarity․ For more complex mistakes‚ consider consulting a needlepoint expert or workshop․ Don’t be afraid to frog (rip it out) and start again – a flawless finish is worth the effort!
Preventing Canvas Distortion
Maintaining canvas shape is crucial for a professional-looking needlepoint piece․ A comprehensive stitch guide will often address this‚ recommending techniques to prevent stretching or warping․ Consistent tension is key – avoid pulling stitches too tightly‚ as this can distort the canvas over time․ Using the correct needle size for your yarn weight also helps․
Periodically check the canvas while stitching‚ comparing it to the original shape․ If distortion occurs‚ gently manipulate the canvas back into shape․ Blocking‚ a finishing technique‚ can also correct minor distortions․ A sturdy frame or mounting during stitching provides additional support and prevents warping․