
Welcome! This guide unlocks your Nikon D40X’s potential. It’s designed for both beginners and enthusiasts, offering a step-by-step journey through its features and functions.
The D40X is a versatile digital SLR, celebrated for its image quality and user-friendly design. This manual provides essential information for successful photography.
Accessing the PDF manual and utilizing the Nikon Manual Viewer 2 app enhances your learning experience, offering convenient access to detailed instructions.
What’s in the Box
Upon opening your new Nikon D40X package, you should find several key components to get you started on your photographic journey. The core of the package, of course, is the Nikon D40X camera body itself, a precision-engineered digital SLR designed for exceptional image capture.
Alongside the camera, you’ll receive the standard kit lens, typically an 18-55mm zoom lens, providing a versatile range for various shooting scenarios. A battery and battery charger are included, ensuring you can power up and begin shooting immediately. Don’t forget the necessary power cord for the charger!
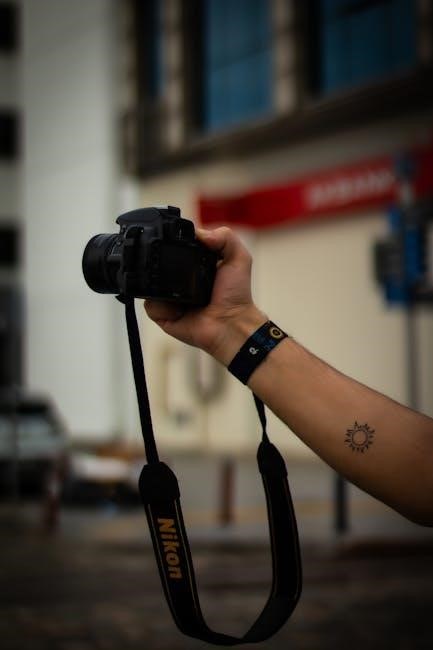
Essential accessories also accompany the camera: a strap for secure handling, a body cap to protect the sensor when a lens isn’t attached, and a lens cap to safeguard the lens optics. You’ll also find various documentation, including the comprehensive user manual – available both in print and as a PDF download – alongside warranty information and quick start guides. Finally, a USB cable is provided for transferring images to your computer.
Key Features of the D40X
The Nikon D40X boasts a 6.0-megapixel CCD image sensor, delivering detailed and vibrant photographs. Its compact and lightweight body makes it exceptionally portable, ideal for travel and everyday shooting. The camera features a bright viewfinder offering a clear view of your subject, aiding in precise composition.
A key strength lies in its 9-point autofocus system, ensuring sharp focus on your intended subject, even in challenging conditions. The D40X supports various shooting modes, including Auto, Scene, and Manual, catering to photographers of all skill levels. The inclusion of in-camera retouching functions allows for quick image adjustments.
Connectivity options include USB for image transfer and video output. Accessing the full potential of the D40X is simplified with the available user manual, often found as a downloadable PDF. The Nikon Manual Viewer 2 app further enhances accessibility, providing a digital resource for mastering its features.
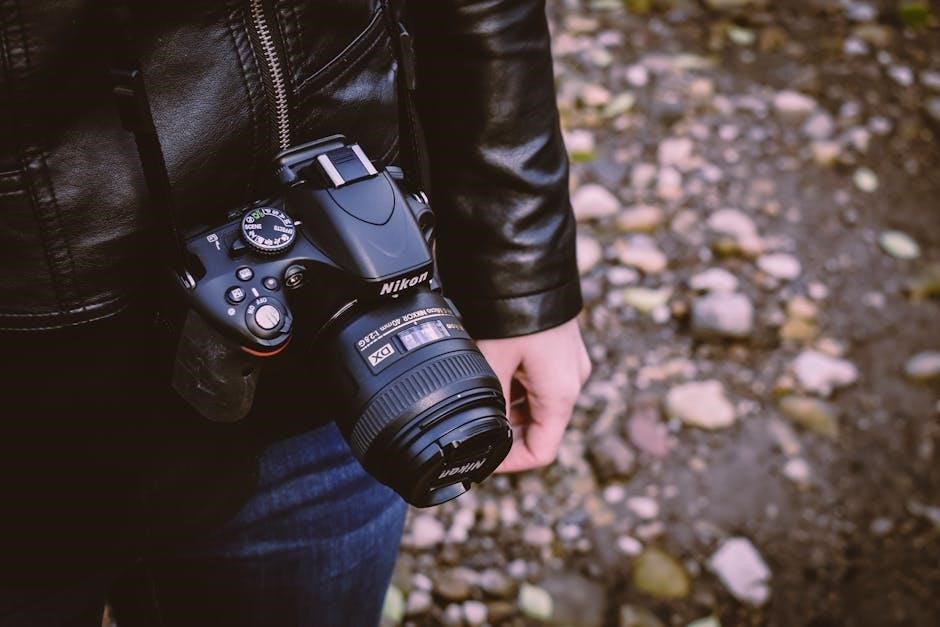
Understanding the Camera Body
The Nikon D40X’s body is designed for comfortable handling and intuitive operation. Key components include the mode dial, used to select shooting modes like Auto, Scene, or Manual. The shutter button initiates image capture, while the control dial facilitates adjustments to settings like aperture and shutter speed.
Located on the rear panel are the LCD screen for image review and menu navigation, and various buttons for accessing frequently used functions. The viewfinder provides a direct optical view of the scene. The battery compartment and memory card slot are typically found at the base of the camera.
Referencing the user manual, often available as a PDF download, is crucial for identifying each component and understanding its function. The Nikon Manual Viewer 2 app offers a digital version for convenient reference while exploring the camera’s physical layout.

Getting Started
Begin your photographic journey! This section guides you through initial setup – inserting the battery and memory card, powering the camera on/off, and setting the correct date and time.
Inserting the Battery and Memory Card
Battery Installation: Locate the battery compartment on the bottom of the Nikon D40X. Gently slide the battery compartment cover latch to open it. Insert the EN-EL9 battery, ensuring the contacts align correctly. Push the battery in until it clicks, then close and lock the compartment cover. Incorrect insertion may prevent the camera from powering on.
Memory Card Insertion: The D40X supports CompactFlash (CF) memory cards. Locate the memory card slot, typically near the battery compartment. Open the card slot cover. Insert the CF card label-side up, pushing it in until it clicks and is securely seated. Do not force the card. Close the card slot cover.
Important Notes: Always use a compatible battery and memory card. Avoid touching the battery contacts. Ensure the card is fully inserted before powering on the camera to prevent data corruption. Refer to the full PDF manual for detailed diagrams and safety precautions.

Powering On and Off
Powering On: To turn on your Nikon D40X, locate the main power switch, typically a slider switch around the shutter button. Move the switch to the “ON” position. The camera will initialize, and the LCD screen will illuminate, displaying the shooting information. Allow a few seconds for the camera to fully boot up.
Powering Off: To switch off the camera, move the main power switch back to the “OFF” position. The LCD screen will darken, and the camera will enter standby mode. Remember to always power off the camera when not in use to conserve battery life.
Auto Power Off: The D40X features an auto power off function to save battery. If the camera is inactive for a set period, it will automatically turn off. This duration can be customized within the camera’s setup menu. Consult the complete PDF manual for detailed settings.
Setting the Date and Time
Accurate date and time settings are crucial for proper image organization and metadata. To set the date and time on your Nikon D40X, navigate to the setup menu using the camera’s buttons. Locate the “Date/Time” option within the setup menu.
Use the multi-selector to adjust the year, month, day, hour, and minute. Confirm each selection by pressing the OK or Menu button. Ensure you select the correct date and time format (e.g., MM/DD/YYYY or DD/MM/YYYY) according to your preference.
Incorrect date/time settings can cause issues with image sorting and chronological order. Refer to the comprehensive Nikon D40X user manual (available as a PDF download) for visual guidance and troubleshooting tips. Properly setting this ensures accurate file naming and organization.
Basic Photography
Begin your photographic journey with the D40X! Explore Auto and Scene modes for simplicity, mastering focus and understanding exposure’s core elements – aperture, shutter speed, and ISO.
Shooting Modes: Auto and Scene
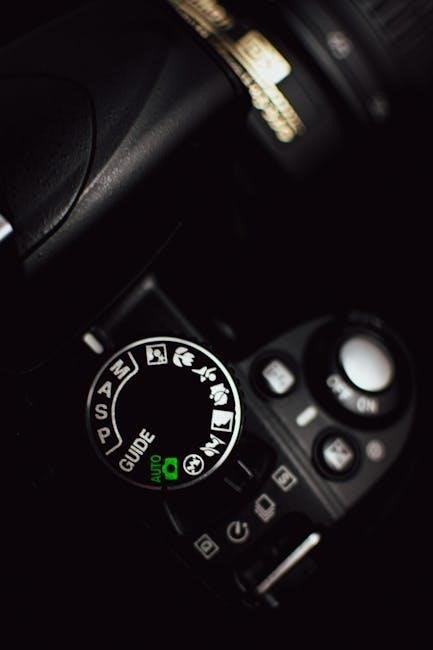
The Nikon D40X offers a range of shooting modes to suit various situations. Auto mode simplifies photography, letting the camera handle all settings – ideal for beginners or quick snapshots. It intelligently analyzes the scene and optimizes settings for best results.
Scene modes provide pre-defined settings tailored to specific scenarios. These include Portrait, Landscape, Close-up (Macro), Sports, and Night Portrait. Selecting the appropriate scene mode ensures optimal image quality for that particular subject or environment.
For example, Portrait mode prioritizes a shallow depth of field, blurring the background to emphasize the subject. Landscape mode maximizes depth of field, ensuring sharpness throughout the entire scene. Experimenting with these modes allows you to quickly achieve professional-looking results without manual adjustments. Remember to consult the full manual (available as a PDF) for detailed explanations of each scene mode and its specific settings.
Focusing: Autofocus and Manual Focus
The Nikon D40X provides both Autofocus (AF) and Manual Focus (MF) options for achieving sharp images. Autofocus is convenient for most situations, utilizing the camera’s focusing system to automatically lock onto your subject. The D40X typically employs a 3-area autofocus system.
You can select different AF-area modes – such as Single-area AF, Dynamic-area AF, and Auto-area AF – depending on your subject’s movement and the scene’s complexity. For stationary subjects, Single-area AF is ideal. Dynamic-area AF tracks moving subjects, while Auto-area AF lets the camera choose the focus point.
Manual Focus gives you complete control over the focusing process. Switch to MF on the lens and use the focusing ring to fine-tune sharpness. This is particularly useful in low-light conditions or when autofocus struggles. Refer to the comprehensive Nikon D40X user manual (available in PDF format) for detailed instructions on utilizing each focusing mode effectively.
Understanding Exposure: Aperture, Shutter Speed, and ISO
Exposure is crucial for well-lit photographs, controlled by three key settings: Aperture, Shutter Speed, and ISO. Aperture (f-stop) controls the lens opening, affecting depth of field – a wider aperture (lower f-number) creates a shallow depth of field, blurring the background.
Shutter Speed determines how long the camera’s sensor is exposed to light. Faster shutter speeds freeze motion, while slower speeds allow more light in but can cause blur. ISO measures the sensor’s sensitivity to light; higher ISO values are useful in low light but can introduce noise (grain).
Mastering these settings allows creative control over your images. The Nikon D40X offers various shooting modes, including Programmed Auto, Aperture-priority, and Shutter-priority, letting you adjust these settings individually or automatically. Consult the detailed Nikon D40X user manual (available as a PDF download) for in-depth explanations and practical examples.
Advanced Photography
Explore creative potential! This section delves into lenses, flash techniques, and white balance adjustments for stunning results with your Nikon D40X.
Working with Lenses
The Nikon D40X utilizes the Nikon F mount, offering compatibility with a vast array of Nikkor lenses – both older, manual focus models and newer autofocus options. Understanding lens specifications is crucial for optimal performance. Pay attention to focal length, maximum aperture, and lens features like Vibration Reduction (VR) for sharper images.
When attaching a lens, align the mounting marks and gently rotate until it clicks securely into place. To detach, press the lens release button and twist. Explore different lens types – wide-angle for landscapes, telephoto for distant subjects, and macro for close-up detail. Remember that DX-format lenses are specifically designed for cameras with APS-C sensors like the D40X, providing full image coverage. Using FX lenses requires awareness of the crop factor, impacting the effective focal length.
Proper lens care, including cleaning and storage, will ensure longevity and maintain image quality. Always use a lens cloth and appropriate cleaning solution.
Using Flash Effectively
The Nikon D40X features a built-in flash, useful for illuminating scenes in low light or adding fill-in light to overcome harsh shadows. To activate, press the flash release button. Explore flash modes like Auto, Auto with Red-Eye Reduction, Fill-Flash, and Manual. Fill-Flash adds a subtle burst of light when shooting outdoors, balancing exposure.
For more advanced control, consider an external flash unit, which offers greater power, flexibility, and features like tilting and swiveling. The D40X supports Nikon’s Creative Lighting System (CLS), enabling wireless flash control with compatible units. This allows you to position flashes off-camera for more dynamic lighting setups.
Be mindful of flash synchronization speed; exceeding it can result in dark bands appearing in your images. Experiment with flash exposure compensation to fine-tune the flash output and achieve the desired brightness. Proper flash usage enhances your photographic creativity.
Understanding White Balance
White balance (WB) ensures accurate color rendition in your photos, compensating for different lighting conditions. The Nikon D40X offers several WB presets, including Auto, Incandescent, Fluorescent, Direct Sunlight, Cloudy, and Shade. Auto WB generally performs well, but specific presets deliver more accurate results in challenging situations.
Incorrect white balance can result in color casts – images appearing too warm (yellowish) or too cool (bluish). Experiment with presets to find the best match for your scene. You can also use Custom WB to manually set the white balance by photographing a white or gray card under the current lighting.
The D40X allows you to fine-tune WB using the Kelvin scale, offering precise control over color temperature. Understanding WB is crucial for achieving natural-looking colors and avoiding unwanted color casts in your photographs, enhancing overall image quality.

Menu Navigation and Customization
Explore the D40X’s menu for extensive customization! Adjust settings for image quality, autofocus, and more. Tailor the camera to your shooting style for optimal results.
Navigating the Camera Menu
The Nikon D40X’s menu system is logically organized into several tabs, each representing a different category of settings. Access the menu by pressing the ‘Menu’ button on the camera’s back panel. Use the multi-selector (directional pad) to navigate up and down through the menu options, and left and right to access different menu tabs.
Key menu tabs include Shooting Menu, Recording Menu, Setup Menu, and Custom Settings. The Shooting Menu controls image capture settings like image quality, ISO, and white balance. The Recording Menu manages settings related to file storage and naming. The Setup Menu allows you to customize camera display and operation.
Within each menu, options are displayed with icons and text descriptions. Press the ‘OK’ button to select an option and access its sub-menu or settings. To return to the previous menu, press the ‘Menu’ button again. Familiarizing yourself with this structure is crucial for efficient camera operation and unlocking the D40X’s full potential. Remember to consult the PDF manual for detailed explanations of each setting.
Customizing Camera Settings

The Nikon D40X allows extensive customization to tailor the camera to your shooting style. Within the Setup Menu and Custom Settings menu, you can personalize various functions. Adjust the button assignments to prioritize frequently used controls, enhancing efficiency. Customize the display format to show desired information in the viewfinder or on the LCD screen.
You can also fine-tune the autofocus settings, metering modes, and image quality options to match your preferences and shooting conditions. Saving custom settings as presets allows quick recall of your preferred configurations. Explore options like custom picture control to achieve unique color and contrast profiles.
Remember that changes made in the Custom Settings menu are saved even when the camera is turned off. Refer to the comprehensive PDF manual for a complete list of customizable options and detailed explanations of their effects. Experimenting with these settings unlocks the D40X’s full potential for creative expression.
Understanding the Setup Menu
The Setup Menu on your Nikon D40X is crucial for fundamental camera configurations. Access it via the menu button and navigate using the directional pad. Here, you’ll find options for setting the date, time, and regional display format – ensuring accurate metadata for your images. Adjust the beep sounds, LCD brightness, and viewfinder display settings for comfortable operation.
Crucially, this menu controls file naming conventions and card formatting options. Properly formatting your memory card is essential for optimal performance. You can also reset all settings to factory defaults if needed, providing a clean slate. The Setup Menu also manages USB connectivity and video output settings.
For detailed explanations of each option, consult the comprehensive PDF manual. Understanding these settings ensures your D40X operates efficiently and accurately, tailored to your specific needs. Careful exploration of the Setup Menu is key to maximizing your camera’s functionality.

Troubleshooting and Maintenance
Resolve common issues with the PDF manual’s solutions. Regular cleaning and proper storage protect your Nikon D40X, ensuring longevity and optimal performance.
Common Problems and Solutions
Problem: Camera won’t power on. Solution: Ensure the battery is fully charged and correctly inserted. Try a different battery if possible. Check the battery contacts for corrosion.
Problem: Images are blurry. Solution: Verify proper focusing technique – use autofocus or manual focus correctly. Increase shutter speed to reduce motion blur. Clean the lens.
Problem: Error messages appear on the LCD. Solution: Consult the PDF manual for specific error code explanations. Reset the camera to factory settings as a last resort.
Problem: Camera freezes or becomes unresponsive. Solution: Remove the battery and memory card, wait a few minutes, and reinsert them. This often resolves temporary glitches.
Problem: Poor image quality/noise. Solution: Lower the ISO setting for cleaner images. Shoot in RAW format for greater editing flexibility. Ensure proper exposure.
Refer to the comprehensive Nikon D40X user manual for detailed troubleshooting steps and further assistance. The Nikon Manual Viewer 2 app can also be helpful.
Cleaning and Storage
Cleaning the Camera Body: Use a soft, dry cloth to wipe the exterior. Avoid harsh chemicals or abrasive cleaners. For stubborn smudges, lightly dampen the cloth with water.
Lens Care: Use a lens brush to remove dust. Clean with a lens cleaning solution and microfiber cloth, applying gentle circular motions. Protect the lens surface from scratches.
Sensor Cleaning: Do not attempt sensor cleaning yourself unless you are comfortable and have the proper tools. Consult a professional for sensor cleaning to avoid damage.
Storage: Store the Nikon D40X in a cool, dry place, away from direct sunlight and extreme temperatures. Use a camera bag for protection during transport.
Remove the battery when storing for extended periods. Keep the memory card in a separate, protective case. Refer to the PDF manual for detailed guidance. The Nikon Manual Viewer 2 app offers additional tips.
Downloading the PDF Manual
Accessing the complete Nikon D40X user manual in PDF format is straightforward. Numerous websites offer free downloads, ensuring you have a readily available reference guide.
A quick online search for “Nikon D40X user manual PDF” will yield several results. Reputable sources include Nikon’s official support website and various camera resource sites.
The PDF manual contains 139 pages of detailed information, covering every aspect of the camera’s operation, from basic settings to advanced features.
Downloading the manual allows offline access, ideal for travel or situations without internet connectivity. It’s a valuable companion to the Nikon Manual Viewer 2 app.
Ensure the downloaded file is from a trusted source to avoid malware. Regularly check for updated versions to benefit from the latest information and corrections.