
Understanding Briggs & Stratton Valve Guide Repair Kits
Briggs & Stratton valve guide repair often involves utilizing specialized kits, as demonstrated in YouTube tutorials, ensuring proper valve clearance for optimal engine performance.
What are Valve Guides?
Valve guides are crucial components within a Briggs & Stratton engine, precisely aligning the valve stems as they move up and down during operation. These guides, often addressed in repair kits, are typically constructed from durable materials like cast iron or bronze.
Their primary function is to maintain correct valve timing and prevent premature wear on both the valves and valve seats. Proper valve guide function is essential for efficient combustion and overall engine health, as highlighted in various repair resources.
Why Valve Guides Fail
Valve guides in Briggs & Stratton engines can fail due to several factors. Over time, constant heat cycles and friction from the valve stems cause wear. Carbon buildup can also contribute, increasing friction and leading to scoring of the guide’s inner surface.
Furthermore, improper valve clearance, or the use of low-quality oil, accelerates wear. Eventually, worn guides result in valve wobble, impacting engine performance and potentially requiring a repair kit for restoration.
Symptoms of Worn Valve Guides
Worn valve guides in a Briggs & Stratton engine manifest through several noticeable symptoms. Excessive oil consumption is common, as oil leaks past the worn guides into the combustion chamber. You might observe blue smoke from the exhaust, indicating oil burning.
Reduced engine power and misfires are also indicators. A noticeable “ticking” sound can emerge from the valve train. Addressing these symptoms promptly with a repair kit prevents further engine damage.
Identifying Your Briggs & Stratton Engine Model
Accurate engine model identification is crucial before purchasing a Briggs & Stratton valve guide repair kit. Locate the engine’s model, type, and code – typically stamped on the valve cover or engine block.
This information ensures compatibility of the repair kit components. Refer to the engine’s documentation or the Briggs & Stratton website for assistance. Using the wrong kit can lead to improper fit and reduced engine performance, so precision is key.
Types of Briggs & Stratton Valve Guide Repair Kits
Briggs & Stratton valve guide repair kits vary based on engine series and repair scope. Some kits include only the valve guides themselves, while others offer a comprehensive package.
These comprehensive kits often contain valve seals, valve springs, and even valve grinding compound. Kits are available for specific model ranges or as universal options, requiring careful selection to match your engine’s needs for a successful repair.
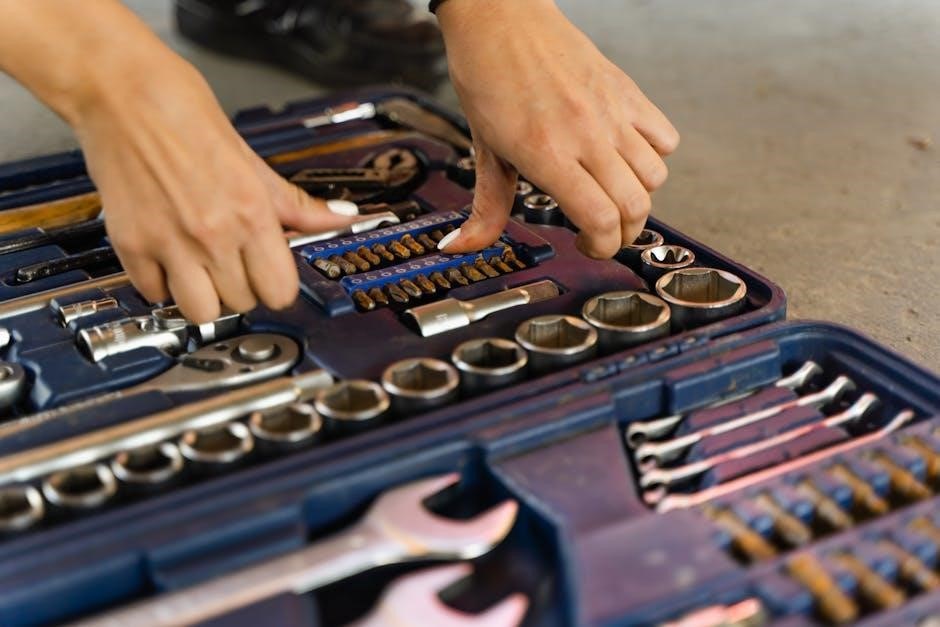
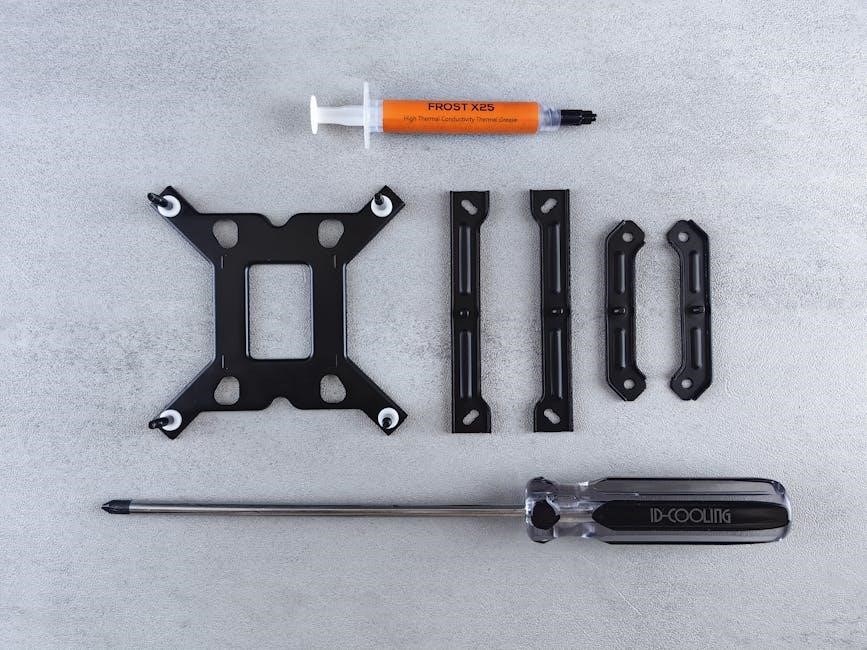
Tools Required for Valve Guide Replacement
Valve guide replacement demands a specific toolkit. Essential tools include a valve guide driver set, a valve spring compressor, and a cylinder head removal socket set.
Precision measuring tools like a micrometer are crucial for verifying guide dimensions. A honing tool may be needed for seat finishing. Standard mechanics tools – wrenches, sockets, and screwdrivers – are also necessary for a complete and effective repair.
Removing the Cylinder Head
Cylinder head removal begins with disconnecting the carburetor and exhaust. Carefully detach any linkages or wiring connected to the head.
Loosen and remove the head bolts in a crisscross pattern to prevent warping. Gently pry the head loose, avoiding damage to the gasket surface. Inspect the gasket for signs of failure. Proper removal is vital for accessing and repairing the valve guides effectively.
Valve Guide Removal Techniques
Valve guide removal often requires a specialized puller tool, ensuring a straight and controlled extraction. Applying heat to the cylinder head can aid in loosening the guides, but caution is essential.
Avoid damaging the cylinder head during the process. If a puller isn’t available, a careful tapping method with a punch may work, but carries a higher risk of damage. Thorough cleaning of the guide bore follows removal.
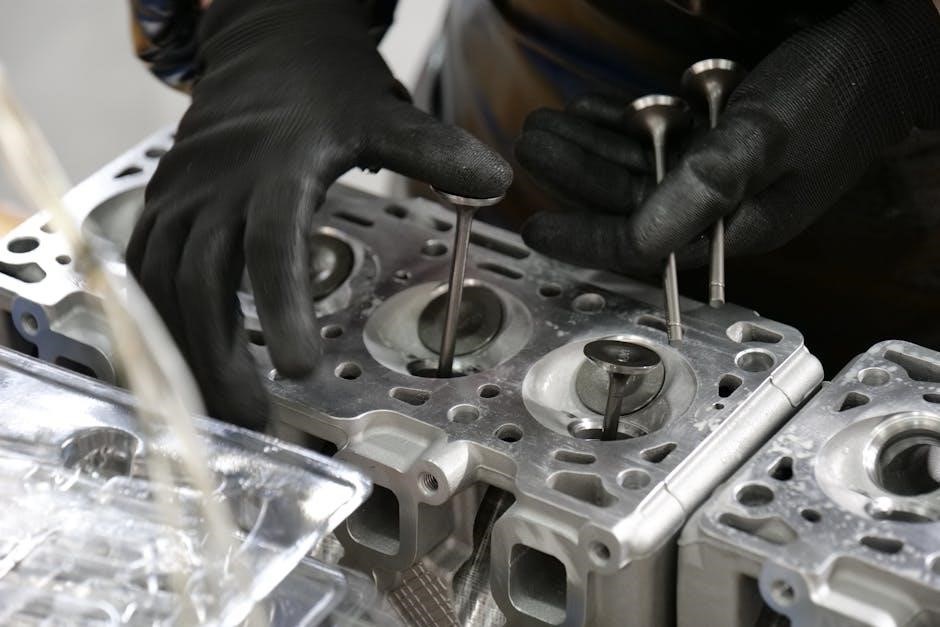
Installing New Valve Guides
Installing new valve guides typically involves chilling the guides and heating the cylinder head to facilitate a press fit. A guide sleeve is crucial for ensuring proper alignment during installation.
Lubricating the guide before pressing it in minimizes friction and prevents damage. Verify the guide is fully seated to the correct depth. After installation, reaming or honing may be necessary to achieve the correct inner diameter for smooth valve operation.
Valve Seat Inspection and Repair
Valve seat inspection is critical after guide replacement. Look for pitting, cracks, or wear that could compromise the valve seal. A valve seat grinding tool can restore a proper sealing surface if necessary.
Ensure the valve angles are correct for optimal combustion. Lapping the valves to the seats further refines the seal. A properly repaired valve seat is essential for maintaining compression and engine efficiency following a valve guide repair.
Valve Clearance Adjustment After Repair
Valve clearance adjustment is crucial post-repair, as new guides and potentially re-seated valves alter valve stem height. Refer to your Briggs & Stratton engine’s specification chart – resources are available online – for correct settings.

Incorrect clearance leads to poor performance or engine damage. Use feeler gauges to precisely set the gap between the valve stem and rocker arm. YouTube tutorials demonstrate this process, ensuring optimal engine operation.
Reassembling the Cylinder Head

Reassembling the cylinder head requires meticulous attention to detail. Ensure all valve components – valves, springs, keepers – are correctly positioned before installing the head. Apply a new cylinder head gasket, aligning it properly to prevent leaks.
Torque the head bolts to the manufacturer’s specifications in the correct sequence. This prevents warping and ensures a secure seal. Double-check all connections before proceeding to the final testing phase.
Testing for Valve Seal
Testing for valve seal is crucial after a Briggs & Stratton valve guide repair. A vacuum test can reveal leaks around the valve seats, indicating improper sealing. Pouring solvent through the intake or exhaust ports while the valves are closed can also identify leaks.
Proper valve seal ensures optimal compression and engine performance. Addressing any leaks before full operation prevents power loss and potential engine damage, guaranteeing a successful repair.
Choosing the Right Repair Kit Vendor
Selecting a reputable vendor for your Briggs & Stratton valve guide repair kit is paramount. Look for suppliers with positive customer reviews and a proven track record of quality parts. Consider vendors specializing in small engine repair, offering comprehensive kits tailored to specific engine models.
Ensure the kit includes all necessary components – guides, seals, and potentially valve seats. Prioritize vendors offering technical support and clear product information for a smooth repair process.
Cost Considerations for Repair Kits
Briggs & Stratton valve guide repair kit costs vary significantly based on engine model and kit completeness. Expect to pay anywhere from $30 to $100+ for a kit, excluding specialized tools. Higher costs often reflect kits including valve seats or upgraded materials.
Factor in potential shipping fees and taxes. Comparing prices from multiple vendors is crucial. Remember to weigh the kit cost against the expense of professional repair, considering your skill level and time commitment.
DIY vs. Professional Repair
DIY valve guide repair, utilizing a Briggs & Stratton repair kit, can save money but demands mechanical aptitude and specialized tools. YouTube tutorials offer guidance, but improper installation can lead to further engine damage.
Professional repair ensures accuracy and expertise, though at a higher cost. Consider your comfort level, available tools, and the engine’s value. For complex repairs or lack of confidence, a professional is recommended.
Repair kits address worn valve guides, restoring proper valve function. YouTube demonstrates the process, while correct valve clearance is crucial for engine health.
Valve guides are precision-engineered components within your Briggs & Stratton engine, crucial for maintaining accurate valve alignment. These tubular parts are typically made of cast iron or bronze, and they ensure the valves move smoothly within the cylinder head.
Their primary function is to control valve stem movement, preventing side loads and ensuring proper sealing. Without properly functioning valve guides, you’ll experience issues like oil consumption and reduced engine power. Repairing or replacing them, often using a dedicated repair kit, restores optimal engine performance.
Valve guides experience wear and tear over time due to several factors. Constant heat cycles, friction from valve stem movement, and the presence of contaminants contribute to gradual erosion. This wear leads to valve wobble and improper sealing, impacting engine efficiency.
Using incorrect valve clearance settings, as highlighted in online resources, can accelerate guide wear. Eventually, guides can become ovalized or loose, necessitating repair or replacement using a Briggs & Stratton valve guide repair kit to restore proper engine function.
Worn valve guides manifest in several noticeable ways. Blue smoke from the exhaust indicates oil entering the combustion chamber, a common symptom. Reduced engine power, misfires, and increased oil consumption are also telltale signs.
A noticeable valve “clatter” or ticking sound can develop. Addressing these symptoms promptly with a Briggs & Stratton valve guide repair kit prevents further engine damage and restores optimal performance, ensuring efficient operation and longevity.
Accurate engine model identification is crucial before purchasing a Briggs & Stratton valve guide repair kit. Locate the engine’s model, type, and code – typically found on the valve cover or engine block.
This information ensures compatibility of the repair kit components. Refer to the Briggs & Stratton owner’s manual or the manufacturer’s website for assistance. Using the correct kit guarantees a successful repair and avoids unnecessary complications during the valve guide replacement process.
Briggs & Stratton valve guide repair kits vary based on engine series and repair scope. Common types include standard kits with guides, seals, and potentially valve seats. Some kits cater to specific engine families, like those for 123K12 models, focusing on precise fitment.
Premium kits may include specialized tools for guide removal and installation. Selecting the appropriate kit depends on the extent of wear and your engine’s specific requirements for a successful repair.

Valve guide replacement demands specific tools. A valve guide driver is crucial for precise installation. You’ll need a valve spring compressor to safely remove valves. A cylinder head removal toolkit simplifies disassembly. Measuring tools, like a micrometer, ensure correct guide dimensions.
Additionally, a rubber mallet, heat source (for stubborn guides), and potentially a honing tool for valve seats are beneficial. Proper tools minimize damage and ensure a reliable repair.
Cylinder head removal begins with disconnecting linkages and the carburetor. Carefully detach the exhaust system and any wiring harnesses. Loosen head bolts in a crisscross pattern to prevent warping. Gently tap the head with a rubber mallet if it’s stuck.
Inspect the head gasket surface for damage. Take note of bolt locations for reassembly. Proper removal avoids engine block damage and ensures a smooth valve guide repair process.
Valve guide removal often requires a specialized puller tool, ensuring a straight extraction without damaging the cylinder head. Applying heat to the head can aid in loosening stubborn guides. Avoid excessive force, which can cause head damage.
If a puller isn’t available, a careful application of penetrating oil followed by gentle tapping with a punch may work; Inspect the guide bore for any remaining debris before installing the new guides.
Installing new valve guides typically involves chilling the guides and gently pressing them into the cylinder head. A guide sleeve is crucial to prevent damage during installation. Ensure the guides are seated to the correct depth, as specified in the engine’s service manual.
Lubrication with assembly lube aids insertion and prevents future seizing. Verify proper alignment before proceeding, guaranteeing smooth valve operation and a secure seal.
Valve seat inspection is critical after guide replacement. Look for pitting, cracks, or excessive wear. A three-angle valve job is often recommended to ensure a proper seal; If the seats are damaged, they may require grinding or replacement using specialized tools.
Properly lapped valves guarantee a tight fit, maximizing compression and preventing exhaust leaks, contributing to optimal engine efficiency and performance.
Valve clearance adjustment is essential post-repair. Refer to your Briggs & Stratton engine’s specification chart – resources are available online, including charts – to determine the correct settings. Incorrect clearance leads to poor performance or engine damage.
Typically, this involves measuring the gap with feeler gauges and adjusting the rocker arms. Precise adjustment ensures optimal valve timing and efficient combustion.
Reassembling the cylinder head requires meticulous attention to detail. Ensure all surfaces are clean and free of debris before installing the head gasket. Torque the cylinder head bolts to the manufacturer’s specifications in the correct sequence – crucial for a proper seal.
Double-check valve spring installation and rocker arm alignment. Proper reassembly prevents leaks and ensures optimal engine compression.
Testing for valve seal is vital after a Briggs & Stratton valve guide repair. A vacuum test can reveal leaks around the valve seats, indicating improper sealing. Pouring solvent through the intake or exhaust ports while the valves are closed can also identify leaks.
Successful testing confirms the repair’s effectiveness, ensuring optimal compression and engine performance. Addressing any leaks is crucial before final engine assembly.

Selecting a reputable vendor for your Briggs & Stratton valve guide repair kit is paramount. Consider vendors specializing in small engine parts, offering genuine Briggs & Stratton components or high-quality aftermarket alternatives.
Read customer reviews and compare pricing across multiple suppliers. Ensure the kit includes all necessary guides, seals, and potentially valve seats. A reliable vendor provides accurate model compatibility information and excellent customer support;
Briggs & Stratton valve guide repair kit costs vary significantly based on engine model and kit contents. Expect to pay between $30 and $100 for a basic kit, potentially more for comprehensive sets including valve seats and seals.
Factor in the cost of additional tools if needed, and consider potential shipping fees. Comparing prices from multiple vendors is crucial. Professional installation will add labor costs, often exceeding the kit price itself.
DIY valve guide repair, utilizing a Briggs & Stratton repair kit, is feasible for mechanically inclined individuals with the proper tools and patience. However, it demands precision and a thorough understanding of engine mechanics.
Professional repair ensures accuracy and avoids potential damage, but comes at a higher cost. Consider your skill level and comfort before deciding. Incorrect installation can lead to significant engine problems and further expenses.