
Dynex TV Instruction Manual: A Comprehensive Guide
Welcome! This manual provides detailed guidance for Dynex TV owners, covering setup, features, troubleshooting, and accessing online support resources effectively․
Understanding Your Dynex TV
Your Dynex TV is designed for easy enjoyment of a wide range of content․ Familiarize yourself with its core functionalities to maximize your viewing experience․ This includes understanding the different input sources, navigating the on-screen menu, and utilizing the remote control effectively․
Dynex TVs offer various screen sizes and resolutions, so knowing your specific model’s capabilities is crucial․ Explore features like smart TV functionality, if applicable, allowing access to streaming apps and online services․ Remember to consult the specifications for details on supported video and audio formats․ Proper understanding ensures optimal performance and longevity of your device․
Unboxing and Initial Setup
Carefully unpack your Dynex TV and verify all components are present – the TV itself, remote control, power cord, and any included stands or mounting hardware․ Before connecting, inspect for any physical damage․ Place the TV on a stable, level surface or prepare for wall mounting following the provided instructions;
Connect the power cord to a grounded outlet․ Then, power on the TV and follow the on-screen prompts for initial setup․ This typically involves selecting your language, connecting to a Wi-Fi network (if applicable), and scanning for available channels․ Ensure a strong Wi-Fi signal for optimal smart features performance․
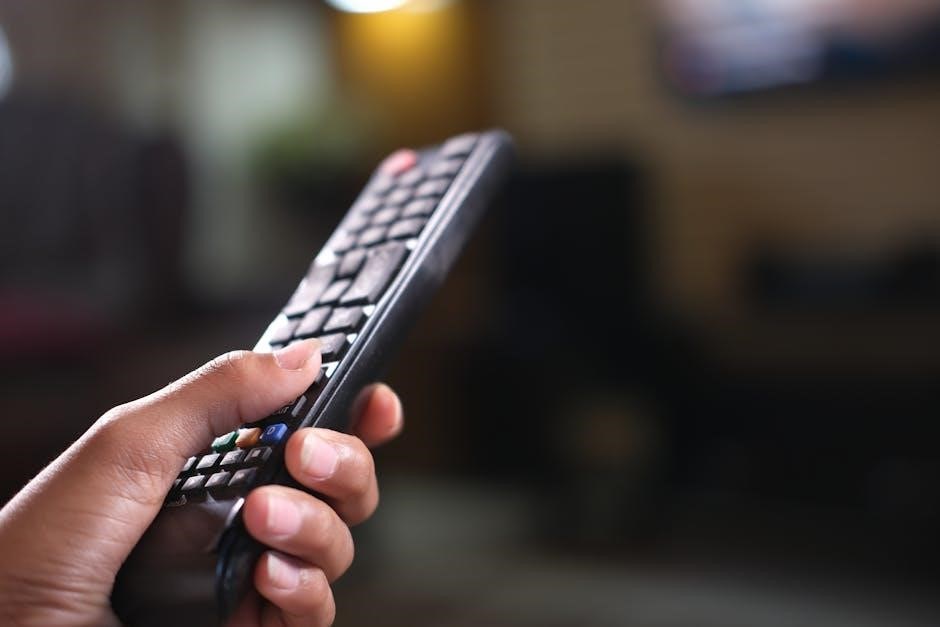
Remote Control Overview

Your Dynex remote is your primary interface for controlling the TV․ Familiarize yourself with the key buttons: Power, Input/Source, Volume Up/Down, Channel Up/Down, Menu, Navigation Arrows, and OK/Select․ The numeric keypad allows direct channel entry․ Dedicated buttons may exist for streaming services like Netflix or apps․
The Menu button accesses the TV’s settings․ Use the navigation arrows to move through options and the OK button to select․ Some remotes feature voice control functionality – consult the button functions section for details․ Ensure proper battery installation for optimal remote operation and range․
Button Functions and Descriptions
Power Button: Turns the TV on or off․ Input/Source: Cycles through available input sources (HDMI1, HDMI2, etc․)․ Volume +/-: Adjusts the audio level․ Channel +/-: Changes channels․ Menu: Displays the on-screen menu for settings adjustments․
Navigation Arrows: Move through menu options․ OK/Select: Confirms selections․ Numeric Keypad: Direct channel input․ Back/Return: Returns to the previous menu․ Exit: Closes the menu․ Some remotes include dedicated streaming app buttons for quick access․
Connecting External Devices
Expanding your viewing experience is easy with Dynex TV’s versatile connectivity options․ Utilize HDMI ports for high-definition devices like Blu-ray players, gaming consoles, and cable/satellite boxes․ USB ports allow for media playback from flash drives or external hard drives, supporting various video, audio, and image formats․
Ensure devices are powered off before connecting․ Select the correct input source on your TV using the remote․ For optimal picture quality, use high-speed HDMI cables․ Explore advanced settings for customized audio and video output configurations․
HDMI Connections: Sources and Settings
HDMI (High-Definition Multimedia Interface) delivers both high-definition video and audio through a single cable․ Dynex TVs typically feature multiple HDMI ports, labeled HDMI 1, HDMI 2, etc․ To select an HDMI source, press the ‘Input’ or ‘Source’ button on your remote and choose the corresponding HDMI port number․
Within the TV’s settings menu, you can adjust HDMI input settings like EDID (Extended Display Identification Data) and HDMI CEC (Consumer Electronics Control) for compatibility and control of connected devices․ Experiment with these settings if you encounter display or control issues․
USB Connectivity: Media Playback
USB ports on your Dynex TV allow you to connect USB flash drives or external hard drives to play media files directly on the screen․ Supported file formats commonly include ․mp4, ․avi, ․mkv, ․jpg, ․png, and ․mp3, though compatibility can vary by model․
Insert the USB drive, then use the TV’s on-screen menu to navigate to the ‘Media’ or ‘USB’ input source․ A file browser will appear, allowing you to select and play your desired content․ Ensure files are stored in a recognizable folder structure for easier navigation․
Navigating the On-Screen Menu
Accessing the menu is simple: press the ‘Menu’ button on your Dynex remote․ The on-screen display (OSD) provides access to all TV settings, organized into logical categories like Picture, Sound, Channel, Network (if applicable), and System․
Use the arrow keys on the remote to highlight desired menu options, and press ‘OK’ or ‘Enter’ to select; To return to the previous menu, press the ‘Back’ or ‘Exit’ button․ Familiarize yourself with the menu structure to quickly adjust settings and customize your viewing experience․
Picture Settings: Adjusting Brightness, Contrast, and Color
Optimizing your picture begins within the ‘Picture Settings’ menu․ Adjust Brightness to control the overall lightness or darkness of the image․ Contrast determines the difference between the brightest and darkest parts, impacting image depth․ Fine-tune Color saturation for vibrant, accurate hues․
Experiment with these settings to achieve your preferred visual experience․ Consider using preset modes like ‘Standard,’ ‘Movie,’ or ‘Vivid’ as starting points․ Advanced options may include sharpness, tint, and color temperature adjustments for precise calibration․

Sound Settings: Equalizer and Audio Output Options
Enhance your audio experience through the ‘Sound Settings’ menu․ Utilize the Equalizer to customize sound frequencies, boosting bass, clarifying vocals, or adjusting treble․ Explore preset sound modes like ‘Music,’ ‘Movie,’ or ‘Standard’ for optimized listening․
Configure Audio Output Options to select your preferred speaker setup – TV speakers, optical output for soundbars, or headphone jack․ Adjust volume levels and explore features like surround sound or audio delay to synchronize sound with the picture perfectly․
Channel Management
Organize your viewing with the ‘Channel Management’ features․ Begin by Scanning for Channels – the TV automatically searches for available over-the-air or cable channels․ After scanning, you can easily create Favorite Channels lists for quick access to your preferred programs․
Customize your channel lineup by deleting unwanted channels or reordering them to your liking․ Utilize the ‘Channel Lists’ function to group channels by genre or preference, streamlining your browsing experience․ Enjoy a personalized and efficient channel viewing experience!
Scanning for Channels
Initiating a channel scan is crucial for accessing available broadcasts․ Navigate to the ‘Channel’ menu within the TV’s settings․ Select ‘Auto Scan’ or ‘Auto Program’ to begin the process․ The TV will automatically search across available frequencies for both digital and analog channels;
Ensure proper antenna or cable connection before scanning․ You may have options for scanning specific frequencies or all available channels․ After completion, review the channel list and delete any unwanted channels․ Repeat the scan if changes occur in your broadcast environment․
Favorite Channels and Channel Lists
Personalize your viewing experience by creating favorite channel lists․ Most Dynex TVs allow you to mark channels as ‘Favorites’ directly from the channel selection screen․ These channels are then easily accessible through a dedicated ‘Favorites’ list in the channel menu․
You can also create custom channel lists, grouping channels by genre or preference․ This feature simplifies navigation, especially with a large number of available channels․ Regularly update your lists to reflect your changing viewing habits and ensure quick access to your preferred content․
Network Setup and Smart Features (If Applicable)
Connect to the internet to unlock your Dynex TV’s smart features․ Navigate to the network settings in the on-screen menu and select your Wi-Fi network․ Enter your password when prompted․ A wired Ethernet connection is also an option for a more stable connection․
Once connected, explore pre-installed streaming apps or download new ones from the app store (if available on your model)․ Enjoy access to a world of online content, including movies, TV shows, and music․ Ensure your network is secure for optimal performance and privacy․
Connecting to Wi-Fi
Accessing Wi-Fi is simple․ From the TV’s home screen, navigate to “Settings” then “Network․” Select “Wi-Fi Connection․” Your TV will scan for available networks․ Choose your network from the list and enter the password using the on-screen keyboard․
Ensure you select the correct network and input the password accurately․ A strong Wi-Fi signal is crucial for smooth streaming․ If connection fails, restart your router and TV․ Some models support both 2․4GHz and 5GHz networks; 5GHz generally offers faster speeds but shorter range․
Streaming Apps and Services
Enjoy endless entertainment! Dynex Smart TVs offer access to popular streaming services like Netflix, Hulu, and Amazon Prime Video․ These apps can be downloaded and installed from the built-in app store․
To access, navigate to the app store via the home screen․ Search for your desired app and select “Install․” Once installed, the app will appear on your home screen․ You’ll need to log in with your existing account credentials․ Regularly check for app updates to ensure optimal performance and access to new features․
Troubleshooting Common Issues
Facing problems? This section addresses frequent issues․ If your Dynex TV displays no picture or sound, check power connections and input sources․ Ensure the volume isn’t muted and the correct input is selected․
If the remote control isn’t working, replace the batteries and ensure there’s a clear line of sight to the TV․ Try resetting the TV by unplugging it for 60 seconds․ For persistent issues, consult the online support resources or contact customer service for further assistance and detailed troubleshooting steps․
No Picture or Sound
Experiencing a blank screen or silence? First, verify the power cord is securely connected to both the TV and a working outlet․ Confirm the volume isn’t muted and isn’t set too low․ Cycle through the input sources (HDMI 1, HDMI 2, etc․) using the input button on the remote or TV itself․
Check if the selected input source is actually transmitting a signal․ A simple TV reboot – unplugging for 60 seconds – often resolves temporary glitches․ If the problem persists, consult the user manual for advanced diagnostics or contact Dynex support․
Remote Control Not Working
Is your remote unresponsive? Begin by replacing the batteries with fresh ones, ensuring correct polarity․ Aim the remote directly at the TV’s infrared sensor, located on the front panel․ Obstructions can interfere with the signal․ Try resetting the remote by removing the batteries for a minute, then reinserting them․
If issues continue, check for interference from other electronic devices․ A universal remote might be a viable alternative․ Consult the Dynex support website for specific troubleshooting steps or potential remote replacement options, including pairing instructions if applicable․
Factory Reset and Advanced Settings
Need a fresh start? A factory reset restores your Dynex TV to its original settings, erasing all personalized configurations․ Access this option within the TV’s on-screen menu, typically under ‘System’ or ‘Settings’․ Be aware this will delete saved channels, picture preferences, and network connections․
Advanced settings allow customization of features like sleep timers, energy-saving modes, and input settings․ Explore these options cautiously, as incorrect adjustments can affect performance․ Refer to the full manual for detailed explanations of each advanced setting and its impact on your viewing experience․
Safety Precautions and Warranty Information
Important safety first! Always unplug your Dynex TV during thunderstorms or prolonged periods of disuse․ Avoid placing the TV near heat sources or in areas with high humidity․ Do not attempt to disassemble or repair the TV yourself; contact qualified service personnel for assistance․
Your Dynex TV is covered by a limited warranty against defects in materials and workmanship․ The warranty period varies by model; consult your purchase documentation for specific details․ Retain your proof of purchase for warranty claims․ The warranty does not cover damage caused by misuse or accidents․
Understanding Dynex TV Models
Dynex offers a diverse range of televisions, varying in screen size, resolution (HD, Full HD, 4K Ultra HD), and smart TV capabilities․ Lower-end models typically focus on essential viewing features, while higher-end models incorporate advanced technologies like HDR for enhanced picture quality and built-in streaming apps․
Identifying your specific Dynex TV model number is crucial for accessing accurate support information and downloading the correct software updates․ The model number is usually located on a sticker on the back of the TV or in your original packaging․ Knowing your model ensures compatibility and optimal performance․
Accessing Online Support and Resources
For comprehensive assistance, Dynex provides a wealth of online resources․ The official Dynex support website offers FAQs, troubleshooting guides, downloadable manuals, and contact information for customer service․ Many common issues can be resolved quickly by searching the online knowledge base using keywords related to your problem․
Furthermore, online forums and communities dedicated to Dynex TVs can be valuable sources of peer-to-peer support․ Users often share solutions and tips for resolving specific issues․ Remember to have your TV’s model number readily available when seeking assistance online for targeted support․
Software Updates and Firmware
Maintaining updated firmware is crucial for optimal Dynex TV performance and access to the latest features․ Regular updates often include bug fixes, improved security, and enhanced compatibility with streaming services․ Your TV may automatically check for updates when connected to the internet, or you can manually initiate a check through the settings menu․
Before installing an update, ensure a stable power supply to prevent interruptions․ The update process may take several minutes; avoid turning off the TV during this time․ Following the on-screen prompts carefully will ensure a successful firmware installation, maximizing your viewing experience․
Checking for Updates
To manually check for software updates on your Dynex TV, navigate to the “Settings” menu using your remote․ Locate the “System” or “Support” section – the exact wording may vary depending on your model․ Within this section, you should find an option labeled “Software Update” or “Firmware Update․”
Selecting this option will prompt the TV to connect to the internet and search for available updates․ If an update is found, you’ll be notified and given the option to download and install it․ Ensure a stable internet connection throughout this process for a smooth and successful update check;
Installing Updates
Once an update is downloaded, your Dynex TV will typically guide you through the installation process․ It’s crucial not to interrupt the installation – do not turn off the TV or unplug it from the power source․ The TV will likely restart several times during the update․
A progress bar will usually display the installation status․ This process can take several minutes, so patience is key․ After the installation is complete, the TV will return to its previous settings, and you can resume normal use․ Verify the successful update by checking the software version in the “About” section of the settings menu․