
Lippert Leveling System Troubleshooting Manual: A Comprehensive Guide
Lippert’s leveling systems require careful attention; this manual provides detailed guidance for diagnosing and resolving common issues, ensuring safe and reliable operation.
Lippert leveling systems have become a standard feature in many recreational vehicles, offering convenience and ease of use when setting up camp. These systems utilize hydraulic power to automatically level the RV, eliminating the need for manual adjustments with leveling blocks. However, like any mechanical system, they can experience issues requiring troubleshooting.
Understanding the core components – including the hydraulic pump, jacks, control panel, and associated wiring – is crucial for effective diagnosis. The Ground Control 3.0 is a popular model, but variations exist; It’s vital to remember these systems are designed solely for leveling and should not be used for support during maintenance or repairs, as this voids the warranty. Proper operation and maintenance, as outlined in this manual, will maximize the lifespan and reliability of your Lippert leveling system.

Understanding Common Error Codes
Lippert leveling systems employ error codes to signal malfunctions, aiding in quick diagnosis. A red fault light illuminated on the control panel indicates a problem requiring attention. Common codes include those related to low hydraulic fluid, jack motor issues, and control panel failures. Recognizing these codes is the first step towards resolution.
For instance, an error signaling low hydraulic fluid necessitates immediate inspection and topping off of the reservoir. Jack motor errors might indicate a wiring problem or a failing motor itself. Control panel malfunctions often respond to a system reset. Ignoring these codes can lead to further damage or system failure. Consulting the specific error code list in your system’s documentation, alongside this manual, will provide targeted troubleshooting steps for efficient repair and continued reliable operation.
Safety Precautions & Warnings
Lippert leveling systems, while convenient, demand strict adherence to safety guidelines. Lippert explicitly warns against using the system for anything beyond its intended leveling purpose – never support a trailer with it during service or maintenance. Failure to comply voids the warranty and, more critically, poses a severe risk of death or serious injury.
Always ensure the area around the leveling system is clear of people and obstacles before operation. Never work under a trailer supported solely by the leveling jacks. Utilize appropriate jack stands for any undercarriage work. Disconnect power before performing any maintenance or repairs. Be mindful of hydraulic fluid pressure and avoid contact with pressurized lines. Prioritize safety to prevent accidents and ensure the longevity of your leveling system.

Troubleshooting Steps
Begin with a thorough initial system check, verifying power supply and connections before proceeding to more complex diagnostics for optimal leveling performance.
Step 1: Initial System Check & Power Supply
Before diving into complex troubleshooting, a meticulous initial system check is paramount. Begin by confirming the leveling system receives adequate power. Verify the connection to the trailer’s battery, ensuring it’s fully charged and properly connected – loose connections are a frequent culprit.
Inspect the external control panel for any visible damage or unresponsive buttons. Attempt to power on the system using the up/down arrows; a green light indicates power is reaching the panel. If no light appears, check the inline fuse associated with the leveling system.
A blown fuse suggests a potential short circuit that needs addressing before further operation. Also, confirm the disconnect switch, if equipped, is in the ‘on’ position. Finally, double-check all wiring harnesses for corrosion or damage, as these can interrupt the power supply and cause malfunctions.
Step 2: Hydraulic Fluid Level Inspection
A properly functioning hydraulic system relies heavily on maintaining the correct fluid level. Low fluid is a common cause of leveling system errors and operational failures. Locate the hydraulic fluid reservoir, typically a translucent tank near the pump.
Visually inspect the fluid level; most reservoirs have ‘min’ and ‘max’ markings. If the fluid is below the ‘min’ line, it must be replenished with the correct type of hydraulic fluid specified by Lippert – using the wrong fluid can cause damage.
Also, examine the fluid’s color and consistency. Dark or cloudy fluid indicates contamination and may require a full fluid flush and filter replacement. Ensure the reservoir cap is securely tightened to prevent leaks and maintain proper pressure within the system. Regularly checking fluid levels is crucial for preventative maintenance.
Step 3: Identifying and Resolving Fault Lights
Fault lights on your Lippert leveling system control panel indicate a problem requiring attention. A solid red light generally signifies an active error, halting operation. Consult your system’s specific documentation to decipher the meaning of each light pattern – flashing lights often denote different issues than solid ones.

Common causes include low hydraulic fluid, jack motor problems, or control panel malfunctions. After identifying the error, attempt basic troubleshooting steps like checking fluid levels or inspecting wiring connections.
If the light persists, a system reset might be necessary. Refer to the reset procedures outlined in this manual. If you’re unable to resolve the issue, contact Lippert support for assistance, providing the specific fault light pattern for accurate diagnosis.
Specific Error Troubleshooting
This section details solutions for frequently encountered error codes within the Lippert leveling system, offering targeted guidance for quick and effective repairs.
Error Code 1: Low Hydraulic Fluid ⎻ Causes & Solutions
Error Code 1 typically indicates insufficient hydraulic fluid within the Lippert leveling system, preventing proper operation and potentially causing damage. Common causes include minor leaks in hydraulic lines, the pump, or at jack connections, leading to gradual fluid loss over time. Another cause is initial setup, where the fluid level might be low directly from the factory.
To resolve this, begin by visually inspecting all hydraulic lines and connections for any signs of leakage – look for dampness or fluid accumulation. If leaks are found, address them immediately before proceeding. Next, carefully check the hydraulic fluid reservoir level; it’s usually a translucent tank allowing for easy viewing. If low, add the correct type of hydraulic fluid (refer to your owner’s manual for specifications) until the appropriate level is reached.
After refilling, bleed the system to remove any air bubbles introduced during the process. Restart the leveling system and monitor for the error to clear. If the error persists or fluid continues to deplete, a more significant leak or pump issue may be present, requiring professional attention.
Error Code 2: Jack Motor Issues ⎻ Diagnosis & Repair
Error Code 2 on a Lippert leveling system often points to problems with the jack motors themselves – either a motor failure or an obstruction preventing movement. Initial diagnosis involves listening for any sounds when attempting to operate the affected jack; a clicking sound might indicate a jammed motor, while silence suggests a complete failure.
Visually inspect the jack for any physical obstructions like debris or bent components. Try manually moving the jack (with the system powered off!) to check for binding. If the jack moves freely, the issue likely lies within the motor or its wiring. Check the wiring connections to the motor for corrosion or looseness, and test the voltage reaching the motor during operation.
Replacing a faulty jack motor typically requires disconnecting the old motor, installing the new one, and re-establishing the wiring connections. If you’re uncomfortable with electrical work, it’s best to consult a qualified RV technician. Remember to always disconnect the power before performing any repairs.
Error Code 3: Control Panel Malfunctions ー Reset Procedures
Error Code 3 on a Lippert leveling system frequently indicates a control panel issue, ranging from a simple software glitch to a more serious hardware failure. Before assuming the worst, attempt a soft reset by cycling the power to the system – disconnect the power source for approximately 30 seconds, then reconnect it. This often resolves temporary errors.
If the soft reset doesn’t work, consult your system’s documentation for specific reset procedures. Some models have a dedicated reset button on the control panel itself. If no reset button exists, you might need to perform a more complex reset involving specific button sequences.
If the control panel remains unresponsive after multiple reset attempts, it may require replacement. Contact Lippert support or a qualified RV technician for assistance. Documenting the exact error message and any preceding events can help expedite the diagnosis and repair process.
Advanced Troubleshooting
For persistent issues, inspect wiring, check hydraulic fluid for leaks, and address Ground Control 3.0 specific problems for optimal system performance.
Checking for Hydraulic Leaks
Hydraulic leaks are a frequent cause of Lippert leveling system malfunctions. Begin by visually inspecting all hydraulic lines, connections, and the hydraulic unit itself for any signs of fluid accumulation. Pay close attention to the areas around the jack cylinders, the control valve, and the pump motor.

Look for wet spots, drips, or pooled fluid. Even small leaks can eventually lead to significant performance issues. If a leak is detected, carefully identify the source. Tighten any loose fittings, but avoid over-tightening, which could damage the components. If a line is cracked or damaged, it will need to be replaced.
Remember to always relieve pressure from the system before disconnecting any hydraulic lines. Cleaning the area around the components can help pinpoint the exact location of a leak. Addressing leaks promptly is crucial for maintaining the system’s efficiency and preventing further damage.
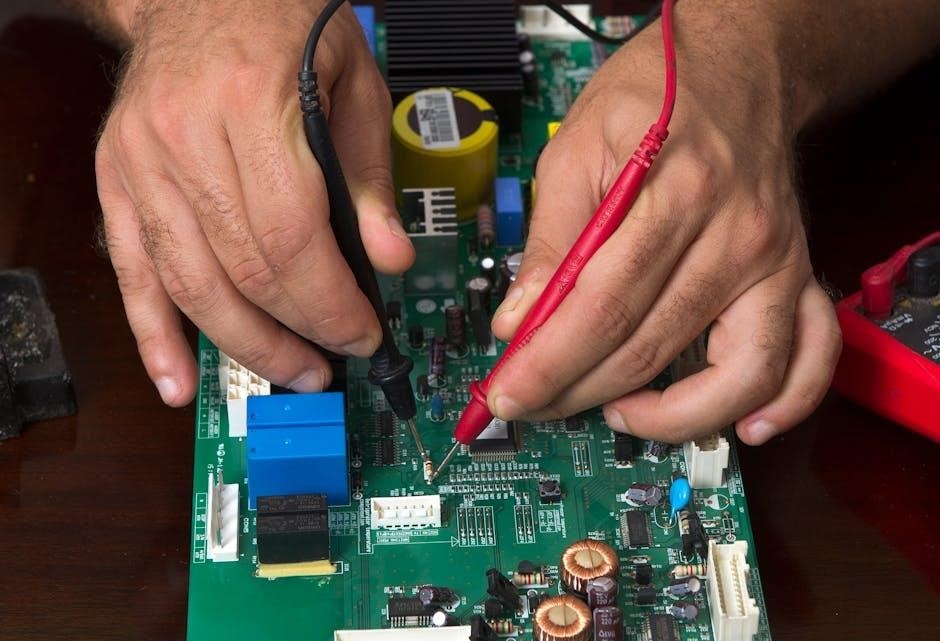
Inspecting Wiring and Connections
A properly functioning Lippert leveling system relies on secure and intact wiring; Begin by visually inspecting all wiring harnesses for any signs of damage, such as frayed wires, cracks in the insulation, or corrosion. Pay particular attention to connections near the control panel, jack motors, and the power supply.
Ensure all connections are clean and tight. Loose or corroded connections can interrupt the signal and cause the system to malfunction. Use a wire brush or electrical contact cleaner to remove any corrosion. Gently tug on each wire to confirm it is securely fastened.
If damaged wiring is found, it must be repaired or replaced immediately. Always disconnect the power supply before working with electrical components. Proper wiring ensures reliable communication between the control panel and the leveling components.
Ground Control 3.0 Specific Issues
The Lippert Ground Control 3.0 leveling system, while advanced, can present unique challenges. A common issue involves the hitch height memory; if lost, re-establishing it through the control panel is crucial. Users have reported fault lights appearing after initiating the hitch height function, often requiring a system reset.
Furthermore, ensure the Ground Control 3.0 app is updated to the latest version for optimal performance and bug fixes. Connectivity issues between the app and the leveling system can sometimes occur, necessitating a Bluetooth re-pairing process.
Remember, using the system to support the trailer for anything other than leveling voids the warranty. Always consult the Ground Control 3.0 manual for specific error code interpretations and troubleshooting steps.

Maintenance & Repair
Regular maintenance, including fluid checks and inspections, extends the life of your Lippert leveling system; replacement parts are readily available online and through retailers.
Lippert Leveling System Replacement Parts – Where to Find Them
When troubleshooting reveals a need for replacement components, sourcing them is straightforward. Lippert offers a comprehensive online store where you can directly purchase parts tailored to your specific leveling system model. This ensures compatibility and quality, eliminating guesswork.
However, you aren’t limited to Lippert’s direct channel. Major online retailers like Amazon also stock a wide array of Lippert leveling system parts, often providing competitive pricing and convenient shipping options. This is particularly beneficial if your RV is no longer covered by the manufacturer’s warranty, allowing you to bypass potential dealership markups.
Before ordering, carefully identify the exact part number required. Refer to your leveling system’s manual or the Lippert website for detailed parts diagrams. Accurate identification prevents ordering incorrect components and streamlines the repair process, getting you back to enjoying your RV sooner.
Performing a System Reset
If your Lippert auto-leveling system exhibits erratic behavior or persistent error codes, a system reset is often the first and simplest troubleshooting step. There are generally two distinct reset procedures, depending on your specific model and control panel. The initial approach involves cycling the power to the entire leveling system – disconnect the power source, wait approximately 30 seconds, and then reconnect it.
This allows the control module to clear its memory and reinitialize. If this doesn’t resolve the issue, a more targeted reset might be necessary, often involving a specific sequence of button presses on the control panel itself. Consult your owner’s manual for the precise reset procedure for your Lippert leveling system.
Always ensure the system is fully retracted before attempting a reset, and be prepared to re-enter any customized settings after the process is complete.
Winterization Procedures for Lippert Leveling Systems
Proper winterization is crucial to prevent damage to your Lippert leveling system during freezing temperatures. Begin by fully retracting all jacks and cleaning them thoroughly to remove any dirt or debris. Next, introduce RV antifreeze into the hydraulic lines. This is typically achieved by disconnecting the hydraulic lines at the manifold and using a hand pump to circulate the antifreeze throughout the system.
Ensure all lines are adequately protected, including those running to the control valve and jack cylinders. It’s also advisable to apply a silicone-based lubricant to the jack shafts to prevent corrosion.
Remember to consult your owner’s manual for specific winterization instructions tailored to your Lippert leveling system model.