Next Gen Ranger Aux Switches Wiring Diagram PDF: Article Plan
Planning a Next-Gen Ranger aux switch install? This guide details wiring, diagrams, troubleshooting, and safety for seamless accessory integration.
The Ford Next-Gen Ranger offers a sophisticated platform for customization, and auxiliary switches are a popular upgrade. These switches provide a clean and convenient way to control aftermarket accessories like spotlights, light bars, compressors, and more, without cluttering the factory controls. This article serves as a comprehensive guide to wiring these aux switches, focusing on the Next-Gen Ranger’s unique electrical system.
We’ll delve into the upfitter harness, color coding, and provide detailed wiring diagrams. Whether you’re a seasoned DIYer or new to automotive electrical work, this resource will empower you to safely and effectively add auxiliary control to your Ranger. A downloadable PDF diagram will also be referenced.
Understanding Next Gen Ranger Auxiliary Switches
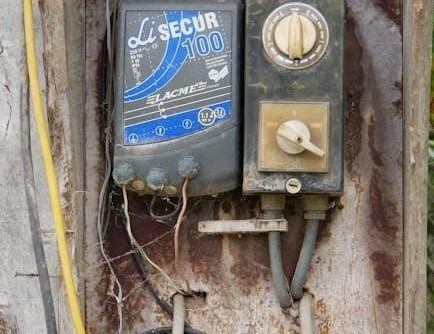
The Next-Gen Ranger’s auxiliary switch panel, often integrated with the overhead console, provides pre-wired control for various accessories; These aren’t simple on/off circuits; they’re designed to interface with the vehicle’s electrical system via the upfitter harness. Understanding this harness is crucial. Each switch corresponds to a specific pin on the harness, offering both switched and constant power.
Unlike older models, the Next-Gen system often requires careful consideration of fuse selection and proper grounding. The factory wiring is robust, but incorrect installation can lead to blown fuses or, worse, electrical damage. Familiarizing yourself with Ford’s official wiring diagrams is highly recommended before beginning any installation.
Benefits of Using Aux Switches
Installing auxiliary switches in your Next-Gen Ranger offers significant advantages beyond simply adding accessories. They provide a clean, factory-look installation, avoiding messy wiring and potentially damaging modifications to the vehicle’s original electrical system. Utilizing the upfitter harness protects the factory warranty and ensures compatibility.
Furthermore, aux switches offer convenient control of accessories like spotlights, light bars, compressors, and even dual battery systems directly from the cab. This eliminates the need for cumbersome dash-mounted switches or relying on potentially unreliable wireless controls. Properly wired aux switches enhance safety and functionality, making your Ranger more capable and enjoyable.
Required Tools and Materials
Successfully wiring auxiliary switches in your Next-Gen Ranger requires specific tools and materials. Essential items include a wire stripper/crimper, multimeter for testing circuits, and a selection of appropriately sized wire connectors (butt connectors, ring terminals). You’ll need automotive-grade wire of varying gauges, depending on the accessory’s amperage draw.
A fuse tap or add-a-fuse is crucial for protecting the new circuits. Don’t forget heat shrink tubing for insulating connections and a zip tie assortment for neat wire management. A basic socket set, screwdriver set, and potentially a trim removal tool will also be necessary. Finally, access to a reliable wiring diagram (PDF recommended) is paramount for a safe and correct installation.
Wiring Diagram Basics
Understanding wiring diagrams is fundamental for a successful aux switch installation in your Next-Gen Ranger. Diagrams visually represent the electrical connections, using symbols to denote components like switches, fuses, relays, and wires. Key elements include identifying power sources (typically the battery or fuse box), ground connections (chassis ground is common), and the accessory itself.
Trace the circuit path carefully, noting wire colors and gauge. Pay attention to fuse locations and amperage ratings. Diagrams will illustrate how the aux switch interrupts the power flow to the accessory. Familiarize yourself with common symbols before starting, and always double-check your connections against the diagram before applying power.
Color Coding Conventions
Ford utilizes specific wire color coding for its electrical systems, crucial for accurate Next-Gen Ranger aux switch wiring. Red typically indicates constant power (battery positive), while black signifies ground. Yellow often represents switched power, activated with the ignition. Blue wires commonly carry signals for various functions, and white often denotes sensor inputs.
The Upfitter harness employs a distinct color scheme for its aux switch outputs. Refer to official Ford wiring diagrams to confirm the exact function of each wire. Incorrectly identifying wire colors can lead to shorts, blown fuses, or damaged components. Always verify with a multimeter when unsure, and never assume a wire’s function based solely on color.
Understanding the Upfitter Harness
The Upfitter harness is a pre-wired connection point simplifying Next-Gen Ranger aux switch installations. Located behind the dash, it provides fused and switched power outputs, eliminating the need to tap into existing wiring. This harness features multiple circuits, each controlled by one of the aux switches on the overhead console.
Understanding the Upfitter’s pinout is vital. Each pin corresponds to a specific switch and amperage rating. Ford provides diagrams detailing this layout. Using an adaptor (like those for Raptors) can streamline connections, but ensure compatibility. Proper connection to the Upfitter harness is key to a safe and functional aux switch setup.
Locating the Aux Switch Panel
The factory aux switch panel in the Next-Gen Ranger is typically integrated into the overhead console. Its exact position may vary slightly depending on the trim level, but it’s generally located centrally, providing easy access for the driver and passenger. The panel houses a set of blank or pre-wired switches, ready for customization.
Accessing the panel often requires removing the console trim. Consult your owner’s manual or online resources for specific instructions to avoid damaging interior components. Once accessed, you’ll find the wiring connector for the Upfitter harness, which powers the switches. Knowing the panel’s location is crucial for wiring and testing.
Step-by-Step Wiring Guide
Begin by disconnecting the battery’s negative terminal for safety. Identify the desired aux switch and its corresponding connector on the Upfitter harness. Connect the accessory’s positive wire to the switch’s output terminal. Run the accessory’s ground wire to a suitable chassis ground point, ensuring a clean connection.
Carefully route all wiring, avoiding moving parts and hot surfaces. Secure wires with zip ties to prevent chafing. Double-check all connections before reconnecting the battery. Test each switch individually to confirm proper operation. Refer to the wiring diagram for specific pin assignments and color codes.
Connecting to the Upfitter Harness
The Upfitter harness, located under the hood, provides pre-wired connections for auxiliary accessories. Locate the correct connector corresponding to your chosen aux switch. Carefully insert the accessory’s wiring into the connector, ensuring proper pin alignment. A click confirms a secure connection.
Avoid forcing the connector; incorrect insertion can damage the pins. Utilize a wiring diagram to verify the correct pin assignments for positive and negative leads. Some harnesses may require adapters for specific accessories. Secure the connections with dielectric grease to prevent corrosion and ensure long-term reliability.
Grounding Considerations
Proper grounding is crucial for safe and reliable auxiliary accessory operation. Utilize existing factory grounding points whenever possible, avoiding drilling new holes. These points are designed to handle the electrical load. Ensure the grounding point is clean and free of corrosion for optimal conductivity.
If a new ground is necessary, select a solid metal chassis point and secure it with a corrosion-resistant bolt and star washer. Keep ground wires as short as possible to minimize resistance and potential voltage drops. A poor ground can cause flickering lights, erratic accessory behavior, or even damage to the electrical system.
Fuse Selection and Installation
Fuse selection is paramount for protecting your Next-Gen Ranger’s electrical system and accessories. Always choose a fuse rating slightly higher than the accessory’s maximum current draw, typically 125% of the draw. Never use a fuse with a higher rating than recommended, as this defeats the safety purpose.
Install fuses in a dedicated fuse block connected to the upfitter harness, or utilize inline fuse holders close to the power source. Ensure the fuse holder is appropriately sized for the fuse type (ATC, ATO, etc.). Regularly inspect fuses for signs of corrosion or damage, replacing them immediately if necessary. Correct fusing prevents shorts and potential fire hazards.
Specific Accessory Wiring Examples
Wiring accessories to your Next-Gen Ranger’s aux switches requires understanding individual power needs. Spotlight wiring typically involves connecting the positive wire to a switched output from the aux panel and the negative to a suitable ground. Light bars, often drawing more current, necessitate heavier gauge wiring and potentially a relay for optimal performance.
Compressor wiring demands careful attention to amperage. Use a dedicated relay triggered by the aux switch to handle the compressor’s power draw, preventing overload on the switch circuit; Always consult the accessory’s documentation for specific wiring instructions and fuse requirements. Proper wiring ensures safe and reliable operation.
Spotlight Wiring
Spotlight installation with Next-Gen Ranger aux switches is relatively straightforward. Begin by identifying a suitable aux switch output. Connect the spotlight’s positive wire to this switched power source. Ensure the wire gauge matches the spotlight’s amperage draw – typically 16 or 14 AWG is sufficient for most LED spotlights.
The spotlight’s negative wire should be securely grounded to a chassis ground point near the mounting location. Avoid long ground runs to minimize potential voltage drop. Consider using a fused relay if the spotlight draws significant power, protecting the aux switch circuit. Double-check all connections for tightness and proper insulation before testing.
Light Bar Wiring
Light bar wiring, similar to spotlights, utilizes the Next-Gen Ranger’s aux switches. However, light bars often demand higher amperage, necessitating a relayed setup. Connect the aux switch output to the relay’s control wire. Run a high-gauge wire (12 or 10 AWG) from the battery’s positive terminal, through a fuse, to the relay’s power input.
The relay’s output then powers the light bar’s positive wire. Ground the light bar securely to the chassis, close to the mounting point. Proper fusing is crucial; select a fuse rated slightly above the light bar’s maximum current draw. Inspect all connections for secureness and insulation, preventing shorts and ensuring reliable operation.
Compressor Wiring
Wiring a compressor to your Next-Gen Ranger’s aux switches requires careful consideration of its power demands. Compressors typically draw significant current, making a relayed circuit essential. Connect the aux switch output to the relay’s control terminal. Utilize a heavy-gauge wire (10 or 8 AWG) directly from the battery’s positive terminal, protected by a suitable fuse, to the relay’s power input.
The relay’s output then supplies power to the compressor’s positive terminal. Ensure a solid ground connection between the compressor and the vehicle’s chassis. Select a fuse rated appropriately for the compressor’s amperage draw, preventing overload. Double-check all connections for tightness and proper insulation.
Troubleshooting Common Issues
Encountering problems with your Next-Gen Ranger aux switch setup? Start with the basics. If switches aren’t working, verify the fuse hasn’t blown – check both the aux switch panel and the accessory’s inline fuse. Repeatedly blowing fuses indicate a short circuit; carefully inspect wiring for damaged insulation or improperly grounded connections.

For wiring harness damage, visually trace the wires, looking for breaks or crimps. Use a multimeter to test continuity. If issues persist, consult the official Ford wiring diagrams or online forums for specific troubleshooting steps related to your accessories. Always disconnect the battery before performing any electrical work;
Switches Not Working
If your Next-Gen Ranger aux switches aren’t functioning, the first step is verifying power. Check the corresponding fuse in both the aux switch panel and the vehicle’s fuse box – a blown fuse is a common culprit. Ensure the switch itself is properly illuminated, indicating it’s receiving power.
Next, confirm the wiring connections at both the switch and the upfitter harness are secure. Use a multimeter to test for voltage at the switch terminals when activated. If voltage is present but the accessory isn’t working, the issue lies within the accessory’s wiring. Consult wiring diagrams and online resources for further diagnostics.
Fuse Blowing Repeatedly
Repeatedly blowing fuses with your Next-Gen Ranger aux switches signals a short circuit or excessive current draw. Immediately disconnect the accessory to prevent further damage. Inspect the wiring for pinched or damaged insulation, especially where wires pass through metal. A short to ground is the most likely cause.
Verify the accessory’s amperage draw doesn’t exceed the fuse rating. Using a higher amperage fuse is dangerous and can cause a fire. Carefully examine the accessory itself for internal faults. If the problem persists, systematically disconnect wiring sections to isolate the short circuit’s location, consulting wiring diagrams for assistance.
Wiring Harness Damage
Next-Gen Ranger aux switch wiring harnesses are vulnerable to damage from chafing, heat, and physical impacts. Regularly inspect the harness for cuts, abrasions, or melted insulation, particularly near mounting points and moving parts. Look closely at areas where the harness routes through the firewall or chassis.
Damaged wiring can cause shorts, intermittent connections, or complete circuit failures. Repair damaged sections using proper splicing techniques and heat-shrink tubing to ensure a secure, weatherproof connection; Avoid using electrical tape as a long-term solution. If extensive damage is present, consider replacing the entire harness for reliability and safety, referencing wiring diagrams during the process.
PDF Diagram Resources
Finding accurate Next-Gen Ranger aux switch wiring diagrams in PDF format is crucial for a successful installation. Official Ford wiring diagrams, often available through Ford’s service website or dealerships, provide the most reliable schematics. However, these may require a subscription or purchase.
Numerous third-party websites and online forums compile wiring schematics contributed by Ranger enthusiasts. Exercise caution when using these resources, verifying the diagram’s accuracy against multiple sources. Online Ranger communities, like dedicated Facebook groups and forums, are excellent places to ask questions and share diagrams. Always prioritize safety and double-check connections before powering up your accessories.
Official Ford Wiring Diagrams
Ford provides comprehensive wiring diagrams for the Next-Gen Ranger, accessible through their official service information platforms. These diagrams detail the upfitter harness, aux switch panel connections, and associated circuitry with pinpoint accuracy. Access typically requires a paid subscription to the Ford Technical Assistance Center (TAC) or a similar service.
Dealership service departments can also provide printed or digital copies of these diagrams, though a fee may apply. Utilizing Ford’s official resources ensures compatibility and adherence to factory specifications, minimizing the risk of electrical issues. These diagrams are invaluable for understanding the vehicle’s electrical system and performing modifications safely and correctly.
Third-Party Wiring Schematics
While Ford’s official diagrams are preferred, numerous third-party wiring schematics for Next-Gen Ranger aux switch installations are available online. Automotive forums, such as those dedicated to Ranger and Raptor models, often host user-created diagrams and wiring guides. These resources can supplement official documentation, offering alternative perspectives and solutions.
However, exercise caution when using third-party schematics; verify their accuracy against multiple sources before implementation. Websites specializing in automotive electrical modifications may also provide detailed wiring diagrams. Always prioritize safety and double-check connections to prevent damage to your vehicle’s electrical system.

Online Forums and Communities
Next-Gen Ranger owners’ forums and online communities are invaluable resources for aux switch wiring information. Platforms like Ford Truck Enthusiasts and dedicated Ranger Raptor groups frequently feature threads discussing wiring diagrams, accessory installations, and troubleshooting tips. Members often share their experiences, modifications, and custom wiring solutions.
These communities provide a space to ask questions, seek advice, and learn from others’ successes and mistakes. Searching existing threads can often reveal solutions to common wiring challenges. Remember to verify information shared by other users and prioritize safety when implementing any modifications based on forum discussions.
Safety Precautions
Aux switch wiring requires strict adherence to safety protocols. Always disconnect the negative battery terminal before commencing any electrical work to prevent short circuits and potential damage. Utilize properly insulated tools and wear appropriate safety gear, including eye protection. Ensure all wiring connections are secure and protected from abrasion or exposure to the elements.
Double-check the polarity of all connections before reconnecting the battery. Incorrect wiring can lead to component failure or even a fire hazard. Select wire gauges appropriate for the current draw of the accessories being powered. When in doubt, consult a qualified automotive electrician for assistance.
Disconnecting the Battery
Before beginning any Next-Gen Ranger aux switch wiring, completely disconnect the battery. Locate the negative (-) battery terminal, typically black, and use a wrench to loosen the nut securing the cable. Carefully remove the cable from the terminal, ensuring it doesn’t accidentally touch any metal surfaces. Tuck the cable away securely to prevent accidental contact.
This crucial step prevents short circuits, protecting both your vehicle’s electrical system and yourself from potential injury. Wait at least 10 minutes after disconnection before touching any wiring to allow any residual charge to dissipate. Reconnect the battery only after verifying all wiring is complete and secure.
Proper Wire Gauge Selection

Choosing the correct wire gauge is critical for a safe and functional Next-Gen Ranger aux switch setup. Undersized wires can overheat, causing a fire hazard, while oversized wires are unnecessary and bulky. Consider the amperage draw of your accessories; higher amperage requires thicker wires.
For most aux accessories, 16-gauge or 14-gauge wire is sufficient. High-power devices like winches or compressors may necessitate 12-gauge or even 10-gauge wire. Always consult the accessory’s documentation for specific wiring recommendations. When in doubt, err on the side of a thicker gauge for added safety and reliability.
Insulation and Protection
Protecting your Next-Gen Ranger’s aux switch wiring is paramount for longevity and safety. Use high-quality automotive-grade wire with durable insulation to withstand temperature fluctuations, abrasion, and exposure to the elements.
Employ split loom tubing or wire sleeving to bundle and shield wires from physical damage. Secure wiring harnesses with zip ties, avoiding tight bends or kinks. Where wires pass through the firewall or metal panels, utilize grommets to prevent chafing and short circuits. Consider applying dielectric grease to connections to resist corrosion. Proper insulation and protection minimize the risk of electrical faults and ensure reliable performance.
Advanced Wiring Techniques
Elevate your Next-Gen Ranger aux switch setup with advanced wiring techniques. Relay integration is crucial for high-current accessories, preventing overload on the aux switch circuit. Utilize a wiring harness adaptor for simplified connections, especially when integrating aftermarket components.
Explore switch panel customization options, including backlit switches or custom engravings for enhanced aesthetics and functionality. Consider employing a pulse-width modulation (PWM) controller for dimmable accessories like LED light bars. Always double-check polarity and secure connections. These techniques ensure a professional, reliable, and feature-rich auxiliary wiring system.
Relay Integration
Integrating relays into your Next-Gen Ranger aux switch wiring is vital for accessories demanding significant current. The aux switches themselves handle control signals, not the full load. A relay acts as an electrically operated switch, using the low-current aux switch signal to control a separate, high-current circuit directly from the battery.
This protects the aux switch panel and wiring from overheating or damage. Choose relays with amperage ratings exceeding the accessory’s maximum draw. Proper relay wiring involves connecting the aux switch output to the relay’s coil, and the battery/fuse to the relay’s load terminals.
Switch Panel Customization
Customizing your Next-Gen Ranger’s aux switch panel allows for a tailored setup reflecting your specific accessory needs. Beyond simply wiring accessories to existing switches, consider labeling each switch clearly for easy identification. Options include pre-printed labels or custom-engraved solutions for a professional finish.
Some enthusiasts explore modifying the switch illumination color using LED replacements. Ensure compatibility with the vehicle’s electrical system. For advanced customization, aftermarket switch panels offer increased switch capacity and enhanced features. Remember to prioritize safety and proper wiring techniques during any modifications.
Using a Wiring Harness Adaptor
Wiring harness adaptors simplify aux switch installation on your Next-Gen Ranger, eliminating the need for splicing into the factory wiring. These adaptors, specifically designed for Ford Ranger/Raptor/Everest models, connect directly to the upfitter harness, providing a clean and efficient solution.
ALTIQ offers adaptors tailored for overhead switch panels. Ensure the adaptor is compatible with your vehicle’s year and switch panel configuration. While adaptors streamline the process, always double-check connections and fuse ratings. Proper installation minimizes the risk of electrical issues and maintains the vehicle’s warranty.