
Welcome! This manual guides users through the Proffieboard, a powerful tool for controlling lights and effects, offering a deep dive into its capabilities and setup procedures.
The Proffieboard is a versatile microcontroller designed specifically for advanced lighting projects, enabling intricate patterns and responsive interactions for immersive experiences.
This manual caters to hobbyists, makers, and professionals seeking to elevate their lighting designs with programmable control and customizable features, ensuring a smooth learning curve.
What is a Proffieboard?
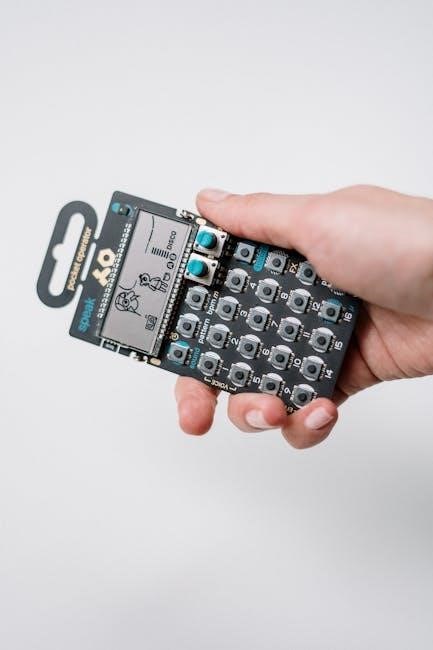
The Proffieboard is a sophisticated, open-source microcontroller board meticulously engineered to empower creators with unparalleled control over lighting systems, particularly within the prop-making and cosplay communities. Unlike conventional microcontrollers, the Proffieboard boasts a specialized architecture optimized for high-speed PWM (Pulse Width Modulation) output, crucial for driving numerous LEDs with precision and fluidity.
At its core, it’s a powerful platform capable of running complex scripts written in a custom scripting language, allowing for dynamic and reactive light effects. This means you can program lights to respond to sound, motion, or even external triggers, creating truly immersive and interactive experiences. The board’s robust processing power and ample memory facilitate intricate animations and real-time calculations, pushing the boundaries of what’s possible with LED-based projects. It’s more than just a controller; it’s a creative engine.
Key Features and Capabilities
The Proffieboard distinguishes itself through a remarkable suite of features. High-speed PWM output across numerous pins enables incredibly smooth and detailed lighting effects, surpassing the capabilities of many alternative controllers. Its scripting language, while custom, is designed for intuitive control, allowing users to define complex animations and interactions without extensive programming knowledge.
Furthermore, the Proffieboard supports a wide range of input methods, including buttons, sensors, and even serial communication, facilitating reactive and interactive designs. Real-time clock functionality allows for time-based effects, while onboard storage eliminates the need for external memory cards. The board’s open-source nature fosters a vibrant community and continuous development, ensuring ongoing improvements and expanded capabilities. It’s a truly versatile and powerful platform for lighting innovation.
Target Audience
This user manual is crafted for a diverse audience, encompassing both beginners and experienced makers. Individuals with a foundational understanding of electronics, such as basic wiring and component identification, will find the learning curve manageable. However, prior programming experience isn’t strictly necessary, as the Proffieboard’s scripting language is designed to be accessible, even to those new to coding.
Specifically, the Proffieboard appeals to cosplayers seeking dynamic prop lighting, event organizers aiming for immersive atmosphere creation, and hobbyists passionate about interactive art installations. Professionals in the entertainment industry, like lighting designers, can leverage its power for custom effects. Ultimately, anyone with a creative vision and a desire to control lights in innovative ways will benefit from exploring the Proffieboard’s potential.

Proffieboard Hardware Overview
Explore the Proffieboard’s physical components! This section details each part, its function, and how they interconnect to bring your lighting projects to life effectively.
Board Components and Identification
The Proffieboard boasts several key components crucial for its operation. The main microcontroller handles all processing and control logic, while the onboard MOSFETs facilitate high-current output for driving LEDs and other lighting elements.
You’ll find dedicated connectors for power input, data communication (typically via USB), and output channels. A real-time clock (RTC) module enables time-based effects and scheduling, even without an internet connection. The board also includes a microSD card slot for storing configuration files, scripts, and light patterns, expanding storage capacity.
Identifying these components is vital for proper setup and troubleshooting. Pay close attention to the labeling on the board; connectors are clearly marked for easy identification. Understanding the function of each component empowers you to maximize the Proffieboard’s potential and create stunning lighting displays. Proper component recognition is essential for successful project implementation.
Pinout Diagram
The Proffieboard’s pinout diagram is essential for connecting external components correctly. Each pin serves a specific function, ranging from power and ground to data input/output and control signals. Refer to the official documentation for the most accurate and up-to-date diagram, as revisions may occur.
Key pins include those for power (Vin, GND), communication (USB, Serial), and the numerous output channels used to control lights. Digital and analog pins offer flexibility for interfacing with various sensors and devices. Understanding the pin assignments prevents damage to the board and ensures proper functionality.
Carefully consult the diagram before making any connections. Incorrect wiring can lead to malfunctions or permanent damage. A clear understanding of the pinout is paramount for successful project integration and reliable operation of your lighting system. Always double-check your connections!
Power Requirements
The Proffieboard operates on a 5V DC power supply. It’s crucial to adhere to these specifications to prevent damage to the board and ensure stable operation. Input voltage should fall within the range of 4.75V to 5.25V for optimal performance. Supplying voltage outside this range may lead to instability or permanent hardware failure.
The board can be powered via the USB port or through the dedicated Vin and GND pins. When using an external power supply, ensure it provides sufficient current to handle the connected lights and peripherals. A minimum of 1A is generally recommended, but higher current may be needed for larger setups.
Always use a regulated power supply to maintain a consistent voltage. Fluctuations can cause erratic behavior. Proper power management is vital for a reliable and long-lasting Proffieboard installation.

Software Setup and Installation
Begin your Proffieboard journey by downloading and installing the necessary software on your computer, establishing a crucial connection for configuration and control.
Downloading the Proffieboard Software
Accessing the Proffieboard software is the first step towards unlocking its full potential. Navigate to the official Proffieboard website – typically found through a search engine – and locate the “Downloads” or “Software” section.
Here, you’ll find the latest version of the Proffieboard IDE (Integrated Development Environment) and any required drivers. Ensure you select the version compatible with your operating system (Windows, macOS, or Linux). The download will likely be a zip file or an installer package.
Carefully review the system requirements listed on the website to confirm your computer meets the minimum specifications for optimal performance. Downloading from the official source guarantees you receive a safe and legitimate copy of the software, free from malware or unwanted modifications. Always verify the file integrity after downloading.
Installing the Software on Your Computer
Initiating the installation process is straightforward. For zip file downloads, extract the contents to a dedicated folder on your computer. Locate the executable file (usually named “install.exe” or similar) within the extracted folder and double-click to launch the installer.
Follow the on-screen prompts, carefully reading each step. You may be asked to accept a license agreement and choose an installation directory. It’s recommended to accept the default settings unless you have a specific reason to change them. The installer will also likely request permissions to install necessary drivers.
Once the installation is complete, a shortcut to the Proffieboard IDE should appear on your desktop or in your applications menu. Ensure all driver installations are successful for proper communication with the Proffieboard hardware. Restart your computer if prompted.
Connecting to the Proffieboard
Establishing a connection requires a compatible USB cable – typically a Micro-USB or USB-C, depending on your Proffieboard model. Plug one end into the Proffieboard’s designated USB port and the other into a free USB port on your computer. Avoid using USB hubs initially, as they can sometimes cause communication issues.
Once physically connected, launch the Proffieboard IDE software. The software should automatically detect the Proffieboard and display it as a connected device. If it doesn’t, verify the cable connection and check your computer’s device manager for any driver errors. You may need to manually select the correct COM port.
Successful connection is indicated by a status message within the IDE, confirming communication with the board. You are now ready to upload configurations and scripts!
Configuring the Proffieboard
Configuration is key! This section details how to customize the Proffieboard’s settings, defining parameters for light control and overall system behavior effectively.
Understanding Configuration Files
Configuration files are the heart of Proffieboard customization. These text-based files, typically with a “.ini” extension, dictate how the Proffieboard operates, defining everything from pin assignments to lighting effects and communication protocols.
Each line within a configuration file represents a specific setting, consisting of a parameter name followed by an equals sign (=) and its corresponding value. Understanding the syntax and available parameters is crucial for successful configuration.
The Proffieboard utilizes a hierarchical structure within its configuration files, organizing settings into sections for clarity. Common sections include ‘Hardware’, ‘Lights’, ‘Display’, and ‘Network’. Carefully reviewing the official documentation is essential to grasp the purpose of each parameter and its impact on the system.
Editing these files requires a plain text editor; avoid using word processors that may introduce formatting errors. Always back up your original configuration file before making changes, allowing for easy restoration if needed. Proper file management is vital for a stable setup.

Basic Configuration Settings
Initial setup involves defining fundamental parameters. The ‘Hardware’ section dictates crucial settings like the board type and communication port. Correctly identifying your Proffieboard model is paramount for proper operation.
Within the ‘Lights’ section, you’ll define the number of light channels and their corresponding pin assignments. Accurate pin mapping ensures signals reach the correct LEDs or lighting components. Consider using a pinout diagram during this process.
The ‘Display’ section configures the optional LCD screen, specifying its type and communication protocol. If no display is connected, this section can be left largely untouched. Proper display configuration enables real-time monitoring.
Finally, the ‘Network’ section allows for configuring Wi-Fi or Ethernet connectivity, enabling remote control and firmware updates. These basic settings form the foundation for more advanced customization.
Advanced Configuration Options
Beyond the basics, Proffieboard offers granular control. The ‘Timing’ section allows precise adjustment of update rates and synchronization parameters, crucial for complex light shows and responsive effects. Experimentation is key to finding optimal values.
‘Input Handling’ enables customization of button, switch, and sensor inputs, defining their actions and triggering events within your scripts. This unlocks interactive lighting experiences.
The ‘Serial Communication’ section allows fine-tuning of serial port settings for debugging and communication with external devices. Advanced users can leverage this for custom integrations.
‘Memory Management’ provides options for optimizing memory usage, particularly important for large scripts and complex effects. Careful memory allocation prevents instability. Explore these options to maximize performance.

Using the Proffieboard with Lights
Connect and illuminate! This section details wiring for LEDs, NeoPixels, and other light sources, enabling stunning visual effects through precise Proffieboard control.
Wiring Diagrams for Common Light Types
Understanding Light Connections: Successfully integrating lights with your Proffieboard requires careful attention to wiring. This section provides detailed diagrams for commonly used light types, ensuring proper functionality and preventing damage.
NeoPixel (WS2812B) Wiring: Connect the NeoPixel data line to a Proffieboard output pin (e.g., OUT1). Ground (GND) must be connected to the Proffieboard’s GND, and power (5V) to the Proffieboard’s 5V output or an external 5V power supply. Important: For longer strips, use a separate power supply!
Addressable LED Strips: Similar to NeoPixels, these strips require data, ground, and power connections. Refer to the strip’s datasheet for specific pin assignments. Ensure correct polarity to avoid damage.
Individual LEDs: When wiring individual LEDs, a current-limiting resistor is crucial to protect both the LED and the Proffieboard. Calculate the appropriate resistor value based on the LED’s forward voltage and current requirements.
Always double-check your connections before applying power to prevent shorts or incorrect wiring configurations. Incorrect wiring can damage the Proffieboard or the lights.
Controlling Light Effects
Unleashing Creative Potential: The Proffieboard excels at creating dynamic and captivating light effects. Through scripting, you can define complex patterns, animations, and reactive behaviors tailored to your specific needs.
Basic Effects: Start with simple effects like solid colors, fading, and blinking. These foundational effects can be easily implemented using Proffieboard’s scripting commands. Experiment with different parameters to achieve desired results.
Advanced Effects: Explore more complex effects such as rainbow chases, color cycling, and reactive lighting that responds to sound or other inputs. Utilize loops, conditional statements, and functions for intricate designs.
Parameter Control: Adjust brightness, speed, and color palettes to fine-tune your effects. Proffieboard allows precise control over every aspect of your lighting setup, enabling endless customization.
Real-time Adjustments: Modify effects on the fly using the Proffieboard’s interface, allowing for dynamic adjustments during performances or installations.
Troubleshooting Light Issues
Addressing Common Problems: Encountering issues with your lights is common. First, verify all wiring connections – loose connections are a frequent cause of malfunctions. Double-check polarity and ensure secure connections to the Proffieboard.
Power Supply Checks: Confirm your power supply provides sufficient voltage and current for all connected lights. Insufficient power can lead to flickering or non-functional lights. Use a multimeter to verify output.
Scripting Errors: Review your Proffieboard script for errors. Syntax mistakes or incorrect commands can cause unexpected behavior. Utilize the debugging tools to identify and correct issues.
LED Compatibility: Ensure your LEDs are compatible with the Proffieboard’s voltage and current limitations. Exceeding these limits can damage the board or the LEDs. Consult datasheets.
Firmware Updates: Keep your Proffieboard firmware updated to benefit from bug fixes and improved compatibility. Refer to the official website for the latest version.
Proffieboard Programming
Dive into scripting! The Proffieboard utilizes a powerful scripting language, allowing users to create dynamic and complex lighting effects with precision and control.
Unlocking Creative Potential: Proffieboard scripting empowers users to transcend pre-defined patterns and craft truly unique lighting experiences. The scripting language is based on a simplified C-style syntax, making it accessible to those with some programming experience, while remaining manageable for beginners willing to learn.
Scripts are essentially sets of instructions that tell the Proffieboard how to control the connected lights. These instructions can range from simple color changes and brightness adjustments to complex animations synchronized with music or external triggers. The core concept revolves around defining layers, each representing an independent set of lighting effects that can be combined and manipulated.
Understanding variables, conditional statements (if/else), and loops are fundamental to effective scripting. The Proffieboard IDE provides helpful tools for writing, testing, and debugging scripts, streamlining the development process. Don’t be afraid to experiment and explore the possibilities – the scripting language is designed to be flexible and forgiving, encouraging creativity and innovation.
Common Scripting Commands
Essential Commands for Lighting Control: Several commands form the backbone of Proffieboard scripting, enabling precise control over connected lights. setPixelColor(pixel, color) sets the color of a specific pixel, while fadeToColor(pixel, color, duration) creates a smooth transition. The delay(milliseconds) command pauses script execution, crucial for timing effects.
For dynamic control, sineWave(amplitude, frequency, phase) generates a sinusoidal wave, ideal for pulsing effects. random(min, max) produces random numbers, adding unpredictability. Layer manipulation is achieved with showLayer(layerNumber) and hideLayer(layerNumber). Commands like brightness(value) adjust overall light intensity.
Understanding these core commands, alongside their parameters, unlocks a vast range of possibilities. Experimenting with combinations and exploring the Proffieboard documentation will reveal even more advanced techniques for crafting captivating lighting displays. Mastering these basics is the first step towards becoming a proficient Proffieboard scripter.
Debugging Scripts
Identifying and Resolving Script Errors: Debugging is a crucial skill for Proffieboard users. The serial monitor is your primary tool; it displays error messages and allows for real-time variable inspection. Utilize print(variable) statements strategically within your code to track values and pinpoint issues. Common errors include syntax mistakes, incorrect variable names, and out-of-bounds pixel access.
Break down complex scripts into smaller, testable segments. Isolate problematic sections and verify their functionality independently. Utilize comments to explain your code’s logic, aiding in error identification. The Proffieboard community forums are invaluable resources for troubleshooting and seeking assistance from experienced users.
Systematic testing and careful analysis of serial output will significantly reduce debugging time and ensure your lighting effects function as intended. Don’t hesitate to seek help when encountering persistent issues.

Proffieboard Resources and Support
Access vital assistance! Explore the official Proffieboard website, active community forums, and a comprehensive FAQ section for solutions and collaborative support.
Official Proffieboard Website
The central hub for all things Proffieboard is the official website, offering a wealth of information crucial for both beginners and experienced users. Here, you’ll discover the latest firmware downloads, meticulously documented specifications, and detailed product information regarding each Proffieboard model available.
Beyond the technical details, the website serves as a gateway to the Proffieboard ecosystem, featuring example configurations, pre-built scripts, and tutorials designed to accelerate your learning process. It’s the definitive source for understanding the board’s capabilities and staying up-to-date with new features and improvements.
Furthermore, the official site provides direct access to purchase Proffieboards and related accessories, ensuring you receive genuine products with full warranty support. Regularly checking the website’s news and blog sections will keep you informed about upcoming events, workshops, and community contributions.
Community Forums and Groups
The Proffieboard community is a vibrant and supportive network of users eager to share knowledge, troubleshoot issues, and collaborate on exciting projects. Several online forums and groups serve as invaluable resources for connecting with fellow enthusiasts and experts.
These platforms provide a space to ask questions, receive assistance with scripting challenges, and showcase your creations. You’ll find a wealth of user-generated content, including custom scripts, wiring diagrams, and detailed build logs, offering inspiration and practical guidance.

Active participation in these communities fosters a collaborative learning environment, accelerating your understanding of the Proffieboard’s capabilities. Dedicated Facebook groups and specialized online forums are excellent starting points for engaging with the community and benefiting from collective expertise.
Frequently Asked Questions (FAQ)
This section addresses common inquiries encountered by Proffieboard users, providing concise answers to frequently asked questions. It’s designed to quickly resolve typical issues and guide you through initial setup and troubleshooting steps.
Questions cover topics like firmware updates, script debugging, power supply compatibility, and common error messages. We’ve compiled a list of the most prevalent concerns, offering clear and practical solutions to help you overcome obstacles.
Before seeking assistance elsewhere, consult this FAQ to potentially find a swift resolution to your problem. If your question isn’t addressed here, the community forums (mentioned previously) are an excellent resource for more specialized support and detailed discussions.