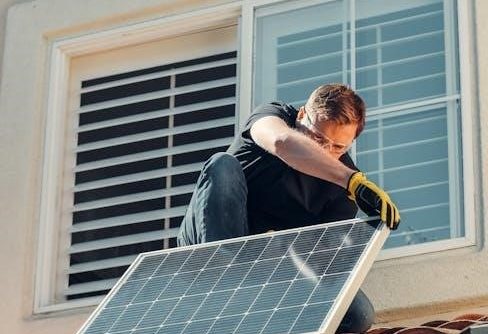
Solar energy adoption is surging globally, driven by cost reductions and environmental consciousness.
Understanding diagrams is crucial for successful installations,
especially with resources like UK PV industry standards evolving since 2002.
Why Use a Diagram?
Visualizing a solar panel system through a diagram is paramount for a smooth, safe, and efficient installation. These diagrams act as a blueprint, detailing the intricate connections between solar panels, inverters (like APSystems DS3s), batteries (in hybrid systems), and the grid.
Without a clear diagram, installers risk incorrect wiring – potentially leading to system failures, safety hazards, or reduced performance. Diagrams ensure adherence to regulatory standards, such as those outlined in UK PV industry guides updated from the DTI grants programmes. They also aid in troubleshooting, allowing quick identification of issues, like incorrect CT sensor (HM, LD) installations. A well-defined diagram is essential for both DIY enthusiasts and professional installers, guaranteeing a reliable and optimized solar energy solution.
Types of Solar Panel Systems
Solar panel systems broadly fall into three main categories, each requiring a distinct installation diagram. Grid-tied systems connect directly to the utility grid, exporting excess energy. Off-grid systems operate independently, relying on battery storage for power, demanding careful capacity planning. Hybrid systems combine both, offering resilience and energy independence;
Diagrams for each type illustrate different wiring configurations and component placements. For example, a Sol-Ark integrated hybrid system diagram will showcase battery connections, while a simple grid-tied setup focuses on inverter and breaker integration. Understanding these distinctions is vital, especially considering advancements like microinverters and power optimizers. Proper system selection, guided by a detailed diagram, ensures optimal performance and aligns with individual energy needs and local regulations.
Understanding System Components
Solar panel systems comprise several key components, each represented clearly in installation diagrams. Solar panels (PV modules) convert sunlight into DC electricity. Inverters – string, micro, or with power optimizers – transform DC to AC for household use or grid export. Mounting hardware securely attaches panels to the roof or ground.
Diagrams detail the interconnection of these elements, including DC wiring, AC wiring, and crucial grounding and bonding. Understanding CT sensor placement (HM, LD) for monitoring power flow is also vital. A comprehensive diagram will illustrate the flow of energy from the panels, through the inverter, to the electrical panel and ultimately, to the loads or the grid. Proper component understanding, aided by a clear diagram, is essential for safe and efficient installation.

Essential Components in a Solar Panel System
Key elements include PV modules, inverters (string, micro, optimizers), and mounting hardware. Diagrams illustrate their connections,
ensuring proper function and safety during installation.
Solar Panels (PV Modules)
Solar panels, or photovoltaic (PV) modules, are the fundamental building blocks of any solar energy system. These panels capture sunlight and convert it directly into direct current (DC) electricity. A comprehensive solar panel installation diagram will clearly depict the arrangement of these modules – whether in a series, parallel, or series-parallel configuration – to achieve the desired voltage and current output.
Understanding the specifications of the PV modules, such as their wattage, voltage, and current ratings, is vital for accurate diagram interpretation. Properly sized panels, coupled with appropriate wiring, are essential for maximizing energy production and ensuring system longevity. Diagrams also illustrate how panels are physically mounted, considering factors like roof pitch and orientation for optimal sun exposure.
Inverters (String, Microinverters, Power Optimizers)
Inverters are critical components, converting the DC electricity generated by solar panels into alternating current (AC) electricity usable by homes and businesses. Solar panel installation diagrams must detail the inverter type – string, microinverters, or power optimizers – and their placement within the system. String inverters are traditional, handling DC from multiple panels, while microinverters attach to each panel individually, offering panel-level monitoring and optimization.
Power optimizers sit between panels and the inverter, maximizing energy harvest. Diagrams illustrate wiring connections, including DC input/output and AC output, alongside safety features. Sol-Ark integration diagrams are particularly important, detailing connections to batteries, grid, and loads. Correct inverter sizing and configuration, as shown in the diagram, are crucial for system efficiency and safety.
Mounting Hardware
Mounting hardware secures solar panels to the roof or ground, and a comprehensive solar panel installation diagram must clearly depict its components and arrangement. This includes racking systems, rails, clamps, and flashing, ensuring structural integrity and weather resistance. UK PV Industry Standards (BRE Digest 489 & 495) emphasize wind load considerations and mechanical installation guidelines, vital for safe and durable installations.
Diagrams should illustrate proper attachment methods to the roof structure, avoiding penetrations that compromise waterproofing. The choice of hardware depends on roof type and local wind/snow loads. Correct installation, as shown in the diagram, prevents damage and maintains warranty compliance. Detailed views of flashing and rail connections are essential for installers, ensuring a secure and long-lasting system.
Basic Wiring Configurations
Wiring configurations—series, parallel, or series-parallel—determine system voltage and current.
A clear diagram illustrates these connections, crucial for optimal performance and safety,
especially when integrating components like Sol-Ark.
Series Connections
Series connections involve linking solar panels end-to-end, where the positive terminal of one panel connects to the negative terminal of the next. This configuration increases the overall system voltage while maintaining the same current as a single panel. A solar panel installation diagram clearly depicts this arrangement, showing how the cumulative voltage is achieved.
It’s vital to ensure that the MPPT voltages do not exceed 550V, a critical safety parameter highlighted in installation guides. Incorrect wiring, or exceeding voltage limits, can damage components like inverters or the Sol-Ark system. Diagrams emphasize the importance of polarity and secure connections. Understanding series connections is foundational for designing efficient and safe solar power systems, especially when considering factors like wind load considerations as outlined in BRE Digest 489.
Parallel Connections
Parallel connections link solar panels side-by-side, connecting positive to positive and negative to negative. This configuration increases the overall system current while maintaining the same voltage as a single panel. A detailed solar panel installation diagram illustrates this, showing how current is summed.
This method is beneficial when aiming for higher amperage, particularly when utilizing components like APSystems DS3 microinverters. Proper wiring is crucial; diagrams emphasize secure connections and correct polarity. Monitoring system performance, including HM and LD power measurements via CT sensors, becomes essential to identify any discrepancies indicating incorrect installation. Remember, opposing Grid or HM values signal an error. Like series connections, parallel configurations must adhere to safety protocols and industry standards, such as those detailed in UK PV Industry Standards.
Series-Parallel Combinations
Series-parallel combinations offer a balance between voltage and current, maximizing system efficiency. This setup involves connecting panels in series to increase voltage, then connecting those series strings in parallel to boost current. A comprehensive solar panel installation diagram clearly depicts these interconnected arrangements.
This is particularly useful when integrating with systems like Sol-Ark, ensuring MPPT voltages remain within safe limits (under 550V). Accurate DC wiring and secure connections are paramount. Monitoring performance data, utilizing CT sensors for HM and LD readings, helps verify correct operation. Adhering to UK PV Industry Standards and considering wind load considerations (BRE Digest 489) are vital for a robust and safe installation. Proper grounding and bonding, as shown in detailed diagrams, are also essential.

Detailed Solar Panel Installation Diagram Elements
Precise diagrams detail crucial aspects like DC and AC wiring, grounding, and bonding.
Understanding these elements, alongside CT sensor placement, ensures a safe and efficient system.
DC Wiring and Connections
DC wiring forms the foundational electrical pathway in a solar system, connecting the solar panels to the inverter or charge controller. Diagrams must clearly illustrate wire gauges, appropriate for voltage and current, and proper conduit usage for environmental protection. Maintaining polarity is paramount; reversed polarity can damage equipment.
Connections should utilize weatherproof connectors, like MC4, ensuring secure and reliable links. MPPT voltages must not exceed 550V, a critical safety parameter. Diagrams should detail series and parallel string configurations, accurately representing voltage and amperage calculations. Proper labeling of DC disconnects is essential for maintenance and emergency shutdowns. Careful attention to these details, as shown in installation guides, guarantees a safe and optimally functioning DC circuit.
AC Wiring and Connections
AC wiring connects the inverter to the electrical panel, delivering solar-generated power to the home or grid. Diagrams must specify wire types (e.g., THHN, THWN) and sizes, adhering to local electrical codes. A dedicated circuit breaker is crucial for system protection, clearly indicated on the diagram. Proper grounding and bonding are vital for safety, preventing electrical shock hazards.
Connections should be made within approved enclosures, ensuring weather resistance and physical protection. CT sensor installation, measuring power flow (HM, LD), requires precise wiring as opposing values indicate errors. Diagrams should illustrate the connection to GRID, GEN, and LOAD terminals. Adherence to these standards, detailed in installation resources, ensures a safe and compliant AC power distribution system.
Grounding and Bonding
Grounding and bonding are paramount for electrical safety in solar installations, protecting against faults and shocks. Diagrams must clearly illustrate grounding electrode conductor (GEC) connections to earth ground, typically a ground rod or water pipe. All metallic components – racking, panels, inverters – require bonding to create an equipotential plane.
Proper bonding minimizes voltage differences, preventing dangerous currents. The diagram should detail bonding jumpers and lugs, ensuring secure connections. UK PV industry standards (DTI grants programmes) emphasize these safety measures. Incorrect CT sensor installation can also impact grounding, indicated by opposing values. Compliance with electrical codes is non-negotiable, safeguarding both property and individuals.
Safety Considerations During Installation
Prioritize safety with electrical protocols, roof measures, and PPE. Diagrams aid safe installation, noting potential hazards. Alarms require immediate attention, like those from a Sol-Ark system.
Electrical Safety Protocols
Electrical safety is paramount during solar installations. Always disconnect power before working on any wiring, adhering to local electrical codes. MPPT voltages must not exceed 550V, a critical Sol-Ark specification to prevent damage and hazards.
Proper grounding and bonding are essential to mitigate shock risks and ensure system stability. Carefully inspect all connections for tightness and insulation integrity. Be aware of potential arc flash hazards and utilize appropriate personal protective equipment (PPE).
Incorrect CT sensor installation, indicated by opposing Grid or HM values, can lead to inaccurate readings and potentially dangerous situations. Regularly test safety devices like ground fault circuit interrupters (GFCIs) to confirm proper operation. Consult diagrams for correct wiring sequences.
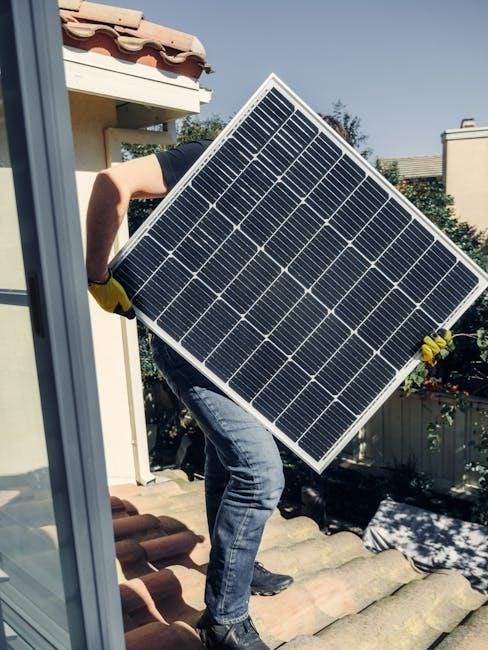
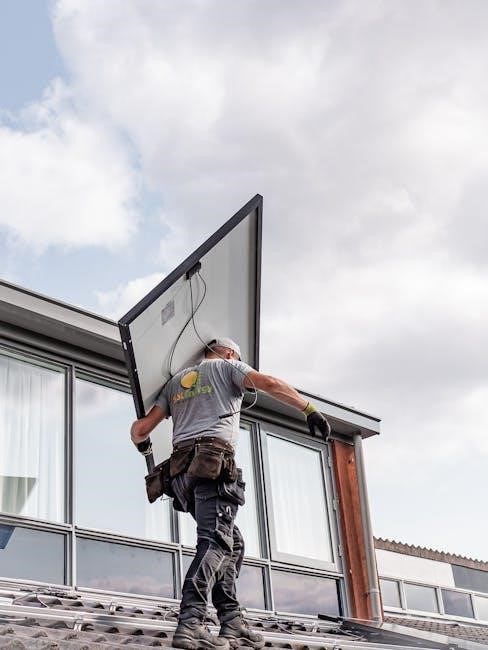
Roof Safety Measures
Working at height presents significant risks; prioritize roof safety during solar panel installation. Utilize appropriate fall protection equipment, including harnesses, lifelines, and secure anchor points. Inspect roofing materials for weaknesses before commencing work, avoiding compromised areas.
Be mindful of weather conditions – avoid installations during high winds, rain, or icy conditions. Establish clear communication protocols with ground personnel. Ensure proper ladder placement and secure footing.
Refer to BRE Digest 489 for guidance on wind loads on roof-mounted PV systems, and BRE Digest 495 for mechanical installation guidelines. Maintain a safe work zone, free from obstructions and clearly marked. Regularly assess and mitigate potential hazards.
Personal Protective Equipment (PPE)
Prioritizing safety necessitates the consistent use of appropriate Personal Protective Equipment (PPE) during every stage of solar panel installation. Essential PPE includes a hard hat to protect against falling objects, and safety glasses to shield eyes from debris.
Wear durable work gloves to prevent cuts and abrasions, and sturdy, non-slip footwear for secure footing on rooftops. Utilize appropriate fall protection, such as a full-body harness, when working at heights.
Consider wearing long sleeves and pants for skin protection. Electrical safety gloves are crucial when handling electrical components. Ensure all PPE is properly fitted and in good condition. Regularly inspect equipment for wear and tear.
System Monitoring and Performance
Monitoring systems track energy production, identifying issues quickly. Interpreting data reveals performance trends, while troubleshooting addresses common problems for optimal output.
Monitoring System Components
Effective system monitoring relies on several key components working in harmony. CT sensors (HM, LD), crucial for accurate power measurement, provide data on grid interaction and overall energy flow. These sensors, particularly the HM type, utilize external current transformers to assess power consumption. The Sol-Ark inverter itself plays a central role, displaying alarm states and MPPT voltages, requiring careful attention to avoid exceeding the 550V limit.
Data loggers and communication gateways transmit performance metrics to user interfaces. Monitoring software, often cloud-based, visualizes this data, enabling performance analysis and proactive issue identification. A reliable internet connection is essential for remote access and real-time monitoring. Properly installed components ensure comprehensive oversight of the entire solar energy system.
Interpreting Performance Data
Analyzing data from your solar monitoring system is vital for optimizing energy production and identifying potential problems. Reviewing MPPT voltages, as highlighted by the Sol-Ark, helps ensure panels operate within safe and efficient parameters. Investigate any alarm states immediately, consulting the inverter’s alarm menu for specific details.
Compare HM and LD power readings; opposing values suggest incorrect CT sensor installation. Track energy generation over time to detect deviations from expected output. Consider environmental factors like shading or weather conditions when evaluating performance. Utilize historical data to establish baselines and identify trends. Proactive data interpretation maximizes system efficiency and longevity.
Troubleshooting Common Issues
Addressing issues promptly is key to maintaining optimal solar system performance. Start by checking the Sol-Ark’s alarm menu for error codes, which pinpoint potential problems. Verify all connections – DC wiring, AC wiring, and grounding – are secure and correct, referencing your installation diagram.
Investigate low power output by examining panel shading, inverter functionality, and CT sensor readings (HM/LD discrepancies). If alarms persist, consult the inverter’s manual or contact a qualified technician. Remember MPPT voltages shouldn’t exceed 550V. Regular monitoring, combined with a systematic approach, ensures quick resolution of common issues.

Specific System Diagram Examples
Diverse setups require tailored diagrams. Explore grid-tied, off-grid, and hybrid systems, including Sol-Ark and APSystems DS3 integrations for comprehensive visual guidance.
Grid-Tied System Diagram
A grid-tied system, commonly depicted in solar panel installation diagrams, showcases a direct connection to the utility grid. Solar panels (PV modules) generate DC electricity, which is then converted to AC power by an inverter – string, microinverters, or power optimizers are frequently used.
The AC output feeds directly into your home’s electrical panel, powering appliances. Excess energy is sent back to the grid, often resulting in credits on your electricity bill (net metering). Crucially, diagrams illustrate the DC wiring from panels to the inverter, AC wiring to the panel, and essential grounding and bonding for safety.
CT sensors, like those used with Sol-Ark, monitor grid and solar power flow. A clear diagram will show proper placement and wiring of these sensors (HM, LD) to avoid installation errors, ensuring accurate power measurement.
Off-Grid System Diagram
Off-grid systems, detailed in solar panel installation diagrams, operate independently of the utility grid, demanding careful planning. Solar panels generate DC power, converted to AC by an inverter. However, unlike grid-tied setups, energy storage is vital – typically battery banks.
Diagrams illustrate the complete power flow: panels to charge controller, charge controller to batteries, and batteries to the inverter, powering loads. Sol-Ark integration diagrams are essential here, showing proper battery connections and system configuration. MPPT voltages must remain below 550V for safe operation.
Monitoring systems are crucial for tracking battery state of charge and overall system performance. A well-defined diagram will show all wiring, fusing, and safety disconnects, ensuring a reliable and independent power supply.
Hybrid System Diagram (with Battery Storage)
Hybrid systems, visualized in detailed solar panel installation diagrams, blend grid-tied and off-grid functionalities. They utilize solar panels, an inverter, battery storage, and maintain a connection to the utility grid. This setup allows for self-consumption of solar power, battery backup during outages, and potential grid export.
Sol-Ark integration diagrams are particularly relevant, showcasing how the inverter manages power flow between solar, batteries, grid, and loads. CT sensors (HM, LD) accurately measure power consumption and production. Proper wiring, as shown in the diagram, is vital to avoid opposing grid or HM values.
These diagrams emphasize safety features like disconnects and grounding, ensuring a secure and efficient energy solution. Monitoring systems track performance, aiding in troubleshooting and optimization.

Advanced System Components & Diagrams
Modern solar installations often include Sol-Ark, APSystems DS3 microinverters, and CT sensors for precise monitoring. Diagrams illustrate complex wiring and integration for optimal performance.
Sol-Ark Integration Diagrams
Sol-Ark integration requires meticulous attention to detail, as it connects to batteries, solar panels, the grid, generation sources, and loads. Diagrams are essential for correctly establishing these connections, ensuring seamless energy flow and system stability.
Crucially, MPPT voltages must remain below 550V to prevent damage. Proper CT sensor installation is vital; opposing grid or HM values indicate incorrect wiring. HM measures power via external CT sensors (L1, L2 & L3), while LD utilizes the internal sensor on the GRID terminal (L1, L2 & L3).
Remember to reverse the steps when powering ON the Sol-Ark. Always check the alarms menu if a red alarm state appears, indicating a potential issue needing immediate attention. Detailed diagrams clarify these processes, promoting safe and efficient operation.
APSystems DS3 Microinverter Diagrams
APSystems DS3 microinverters are gaining popularity for DIY solar installations, offering a robust and scalable solution. Detailed diagrams are paramount for successful integration, particularly when transitioning from considering quad module offerings. These visuals clarify wiring configurations and communication protocols.
Single-line diagrams mirroring successful installations demonstrate best practices, aiding in component selection and system design. Proper documentation, like that shared by experienced installers, is invaluable. Diagrams should clearly illustrate AC and DC connections, grounding procedures, and monitoring system integration.
Understanding the DS3’s communication network is key, as is ensuring correct pairing with compatible panels. Accurate diagrams minimize errors and maximize energy production, contributing to a reliable and efficient solar power system.
CT Sensor Installation & Wiring (HM, LD)
Current Transformer (CT) sensors are vital for accurate energy monitoring in Sol-Ark systems. Diagrams must clearly depict the wiring of both High Measurement (HM) and Low Detection (LD) sensors, crucial for grid and power flow analysis.
HM sensors measure power via external CTs (L1, L2 & L3), while LD sensors utilize the internal sensor on the GRID terminal (L1, L2 & L3). Incorrect installation leads to opposing grid or HM values, triggering alarms and inaccurate readings. Diagrams should emphasize proper polarity and connection points.
Troubleshooting relies on these diagrams; a red alarm state necessitates checking the alarms menu. MPPT voltages must remain below 550V, and diagrams should illustrate safe operating parameters. Precise wiring ensures reliable performance data.
Regulatory and Standards Compliance
Adherence to standards is paramount. UK PV installations follow evolving guidelines from DTI grants programmes, alongside BRE Digests 489 & 495 for wind and mechanical loads.
UK PV Industry Standards (DTI Grants Programmes)
The UK’s photovoltaic (PV) industry has matured significantly, particularly influenced by the experience gained through the Department of Trade and Industry (DTI) solar PV grants programmes. These programmes, initiated in the early 2000s, were instrumental in driving down costs and fostering innovation within the sector.
Since the first edition of relevant guidance in 2002, updates have continually reflected the practical learnings from these installations. This iterative process ensures that standards remain current and address emerging challenges. The focus has been on best practices for installation, safety, and performance monitoring.
These standards are vital for ensuring the longevity and reliability of solar panel systems, protecting both installers and end-users. They also contribute to the overall growth and sustainability of the UK’s renewable energy infrastructure.
Wind Load Considerations (BRE Digest 489)
Roof-mounted photovoltaic (PV) systems are exposed to significant wind forces, making accurate assessment of wind loads critical for safe and durable installations. BRE Digest 489 provides essential guidance on calculating these loads, considering factors like roof pitch, building height, and geographical location.
The document details methods for determining wind pressures acting on the PV array and its mounting structures. It emphasizes the importance of selecting appropriate mounting hardware capable of withstanding these forces. Ignoring wind load considerations can lead to structural failure and potential hazards.
Proper mechanical design is paramount, and while not within the scope of all documentation, BRE Digest 489 serves as a key reference for ensuring PV systems can withstand extreme weather conditions, maintaining safety and performance over their lifespan.
Mechanical Installation Guidelines (BRE Digest 495)
BRE Digest 495 offers comprehensive guidance on the practical aspects of mechanically installing roof-mounted photovoltaic (PV) systems. This document complements wind load considerations (Digest 489) by detailing best practices for securing the array to the roof structure.
It covers crucial elements like selecting appropriate fixings, ensuring adequate roof waterproofing, and maintaining necessary clearances for ventilation and maintenance. The digest emphasizes the importance of compatibility between the mounting system and the roof type.
Following these guidelines minimizes the risk of roof damage and ensures the long-term integrity of the PV installation. While mechanical design isn’t fully covered, Digest 495 provides vital practical advice for installers, contributing to safe and reliable solar energy generation.